How to Install and Configure TaskBoard on Ubuntu 18.04 LTS

TaskBoard is an open source Kanban-inspired app that can be used to keep track of things that need to get done. It comes with a built-in web interface for keeping track of tasks. It is simple, easy to install and works on almost any web hosts. TaskBoard allows you to create unlimited board, projects and customize columns within boards. TaskBoard provides lots of features such as, basic user management, RESTful API, Items display complete history of activities and Full history of all board activity.

In this tutorial, we will learn how to install TaskBoard on Ubuntu 18.04 server.

Requirements

  • A server running Ubuntu 18.04.
  • A root password is set up to your server.

Getting Started

The first step is to become the root user on your system. To do so, run the command:

sudo -s

Before starting, you will need to update your system with the latest version. You can do this by running the following command:

sudo apt-get update -y
sudo apt-get upgrade -y

Once your server is updated, restart your server to apply the changes.

Install Java

First, you will need to install java to your system. By default, the latest version of Java is not available in the Ubuntu 18.04 default repository. So, you will need to add the java repository first.

You can do this with the following command:

add-apt-repository ppa:webupd8team/java

Once the repository is installed, you can install the java with the following command:

apt-get install oracle-java8-installer -y

After installing Java, check the version of java with the following command:

java -version

You should see the following output:

java version "1.8.0_201"
Java(TM) SE Runtime Environment (build 1.8.0_201-b09)
Java HotSpot(TM) 64-Bit Server VM (build 25.201-b09, mixed mode)

Once you have done, you can proceed to the next step.

Install Apache, SQLite, and PHP

TaskBoard runs on a web server, written in PHP and use SQLite to store their data. So, you will need to install Apache, SQLite, PHP and other required dependencies to your server. You can install all of them with the following command:

apt-get install apache2 sqlite3 php7.2 libapache2-mod-php7.2 php7.2-cli php7.2-common php7.2-json php7.2-readline php7.2-sqlite3 libaio1 libapr1 libhtml-template-perl libaprutil1-dbd-sqlite3 libaprutil1-ldap libaprutil1 libdbi-perl libterm-readkey-perl curl libwrap0 unzip wget -y

Once all the packages are installed, start apache service and enable it to start on boot with the following command:

systemctl start apache2
systemctl enable apache2

Install TaskBoard

First, download the latest version of TaskBoard from Git repository with the following command:

cd /tmp
wget https://github.com/kiswa/TaskBoard/archive/master.zip

Once the download is completed, extract the downloaded file with the following command:

unzip master.zip

Next, move the extracted directory to the Apache web root directory with the following command:

mv TaskBoard-master /var/www/html/taskboard

Next, change the directory to the taskboard and update the composer with the following command:

cd /var/www/html/taskboard
./build/composer.phar self-update

You should see the following output:

Updating to version 522ea033a3c6e72d72954f7cd019a3b75e28f391.
    Downloading: 100%         
Use composer self-update --rollback to return to version feefd51565bb8ead38e355b9e501685b5254d0d5

Next, install the php dependencies with composer by running the following command:

./build/composer.phar install

You should see the following output:

Do not run Composer as root/super user! See https://getcomposer.org/root for details
Loading composer repositories with package information
Installing dependencies (including require-dev) from lock file
Package operations: 5 installs, 0 updates, 0 removals
  - Installing firebase/php-jwt (1.0.0): Downloading (100%)         
  - Installing gabordemooij/redbean (v4.2.1): Downloading (100%)         
  - Installing ircmaxell/password-compat (v1.0.4): Downloading (100%)         
  - Installing phpmailer/phpmailer (v5.2.14): Downloading (100%)         
  - Installing slim/slim (2.6.2): Downloading (100%)         
phpmailer/phpmailer suggests installing league/oauth2-client (Needed for XOAUTH2 authentication)
phpmailer/phpmailer suggests installing league/oauth2-google (Needed for Gmail XOAUTH2)
slim/slim suggests installing ext-mcrypt (Required for HTTP cookie encryption)
Generating autoload files

Next, build JavaScript and CSS with the following command:

./build/build-all

You should see the following output:

Building...
 Installing dependencies
Do not run Composer as root/super user! See https://getcomposer.org/root for details
Loading composer repositories with package information
Installing dependencies (including require-dev) from lock file
Nothing to install or update
Generating autoload files
 Compiling lib JS files...
 Minifying lib CSS files...
 Compiling app JS files...
 Minifying app CSS files...
 Updating index.html...
Build Complete

Next, give proper permissions to the taskboard directory with the following command:

chown -R www-data:www-data /var/www/html/taskboard
chmod -R 755 /var/www/html/taskboard

Once you have done, you can proceed to configure Apache for TaskBoard.

Configure Apache for TaskBoard

Next, you will need to create an Apache virtual host file for TaskBoard. You can do it with the following command:

nano /etc/apache2/sites-available/taskboard.conf

Add the following lines:

 VirtualHost *:80
    ServerAdmin [email protected]
    DocumentRoot "/var/www/html/taskboard"
    ServerName 1example.com
    Directory "/var/www/html/taskboard"
        Options Indexes FollowSymLinks
        AllowOverride All
        Require all granted
    /Directory
    ErrorLog "/var/log/apache2/taskboard-error_log"
    CustomLog "/var/log/apache2/taskboard-access_log" combined
/VirtualHost

Save and close the file. Then, enable the virtual host file with the following command:

a2ensite taskboard.conf

Next, enable Apache rewrite module and restart Apache web service with the following command:

a2enmod rewrite
systemctl restart apache2

Access TaskBoard

TaskBoard is now installed and configured, it’s time to access TaskBoard web interface.

Open your web browser and type the URL http://example.com. You will be redirected to the following page:

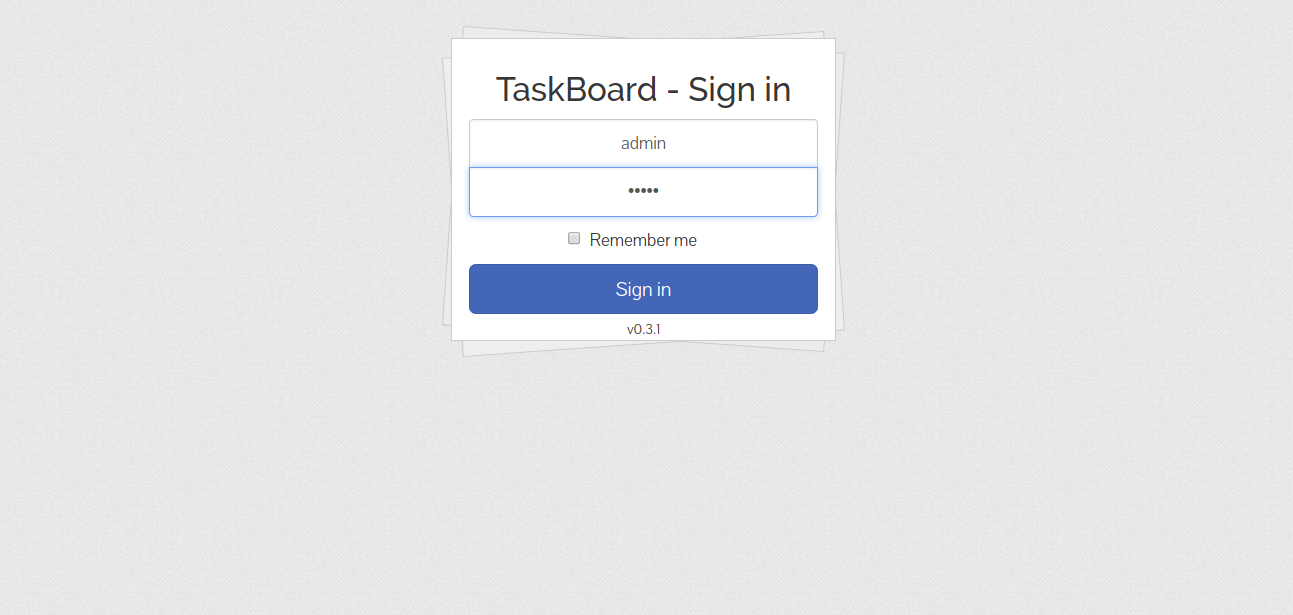
Provide default administrator username and password as admin / admin and click on the Sign In button. You should see the following page:

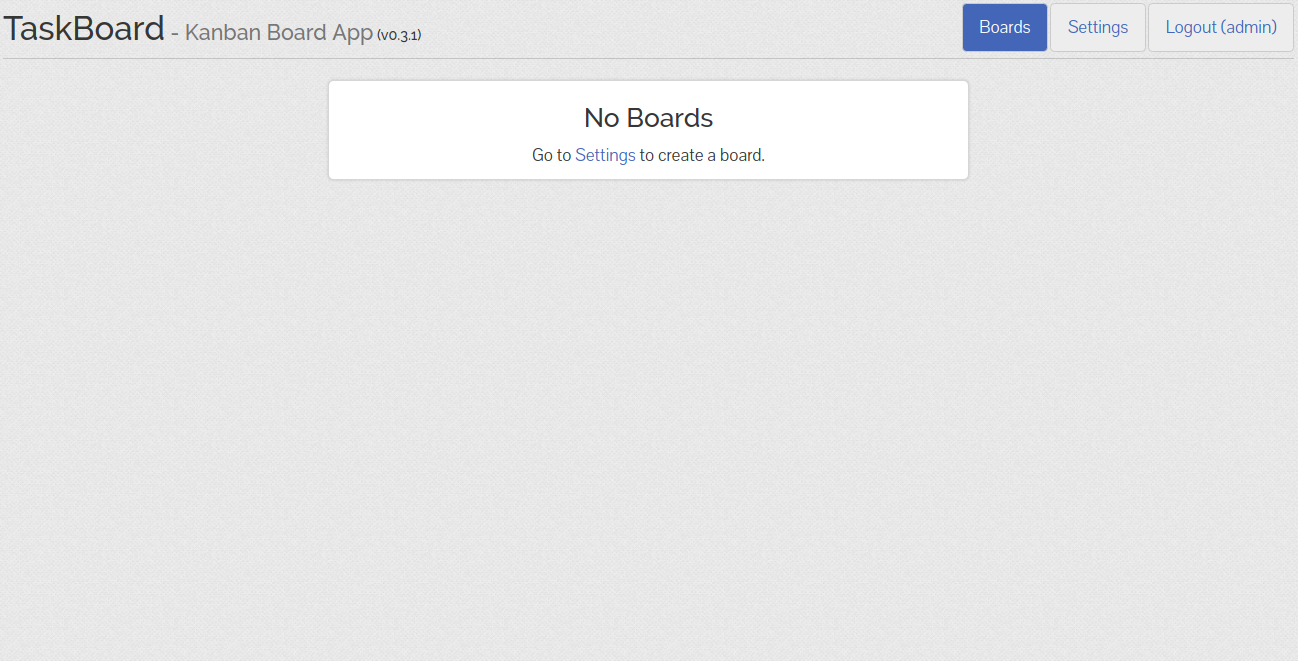
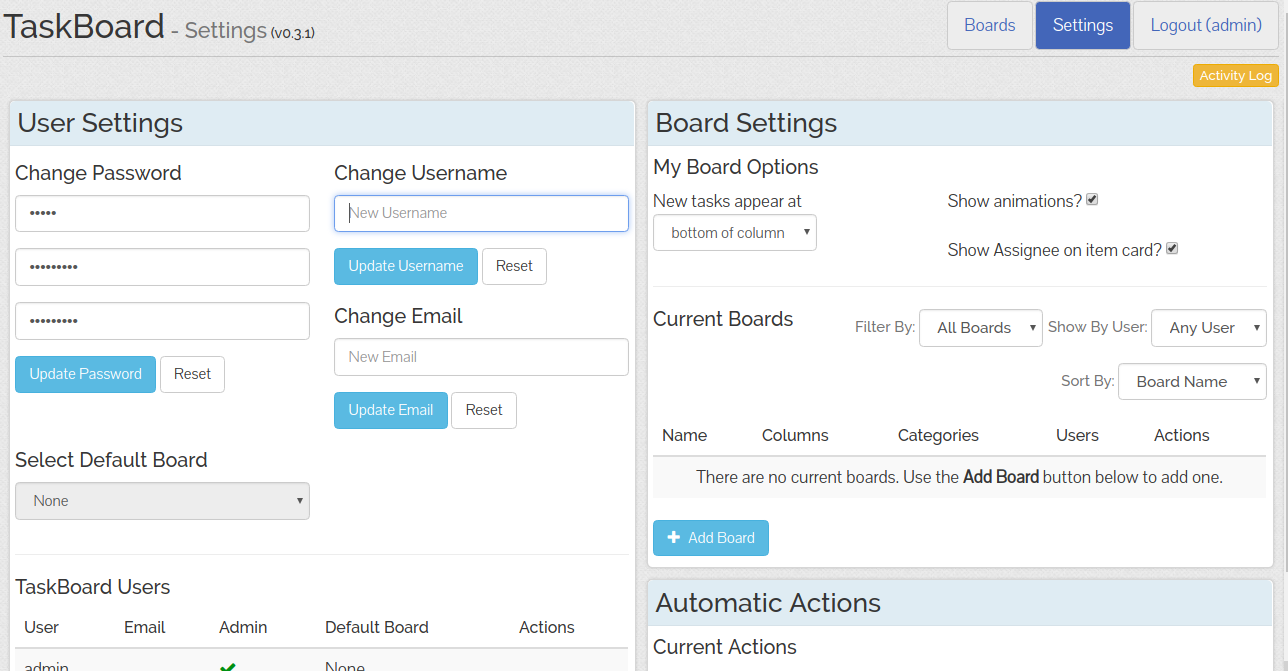
Now, click on the Settings button and change the default password as you wish, then click on the Update password button. Next, click on the Add Board button, you should see the following page:

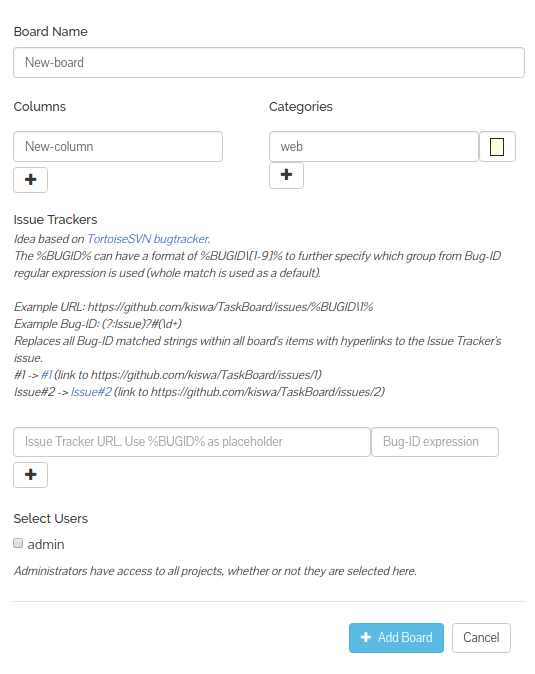
Next, provide Board Name and Columns and click on the + button, you should see the following page:

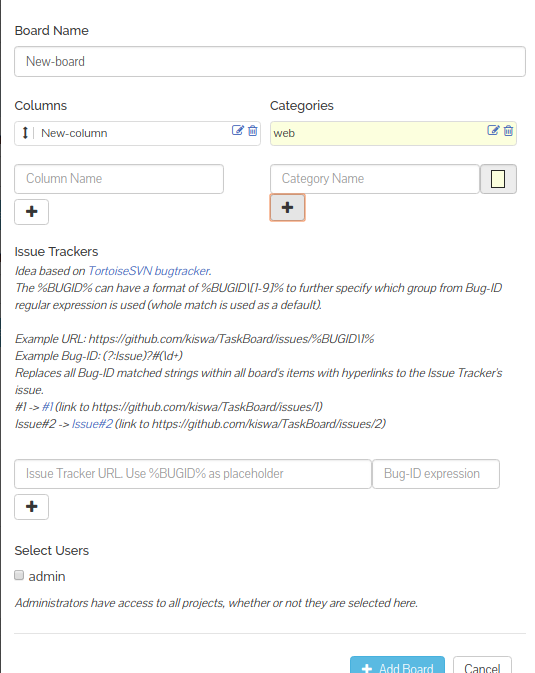
Now, click on the Add Board button to add the board.

Next, navigate to home page and select your newly created board. You should see the following page:

Congratulations! you have successfully installed TaskBoard on Ubuntu 18.04 server. You can now keep track of your task using TaskBoard. Feel free to ask me if you have any questions.

Repair Linux Boot failures in Grub 2 rescue mode

As GRUB 2’s ability to fix boot problems is greatly improved over the original GRUB bootloader. This article provides the you with information on options available for repairing GRUB 2 boot issues and specific instructions on how to use the GRUB 2 terminal. The instructions are written for GRUB 2.

How it looks?

There are basically three messages or error or screen mode whatever you say, when grub fails to boot.

grub: This is the screen mode you see when grub has found everything ecept the configurationn file. This file probably will be grub.conf.

grub rescue: This is the mode when GRUB 2 is unable to find the grub folder or its contents are missing/corrupted. The GRUB 2 folder contains the menu, modules and stored environmental data.

GRUB: Just “GRUB” nothing else indicates GRUB 2 failed to find even the most basic information needed to boot the system.

This is are the basic errors that we se on the boot. Althought there are few more errors that can be seen on the screen like frozen splash screen, Busybox or Initramfs: GRUB 2 began….
But each of the GRUB 2 failure modes can be corrected either from GRUB 2 terminal or the Live boot CD or DVD of the distro , there are also 3rd party rescue tools available out there.

Basic Commands available.

This are the commands that can be used when when you enter the GRUB 2 terminl mode by pressing “c”.

boot (Initiate the boot, also F10 or CTRL-x)

cat (view the contents of config or txt files; cat (hd0,1)/boot/grub/grub.cfg)

configfile (Load a GRUB 2 configuration file such as grub.cfg; configfile (hd0,5)/boot/grub/grub.cfg.)

initrd (Loads the initrd.img, necessary for booting; initrd (hd0,5)/initrd.img.)

insmod (Loads a module; insmod (hd0,5)/boot/grub/normal.mod, or insmod normal.)

linux (Loads the kernel; insmod /vmlinuz root=(hd0,5) ro.)

loop (Mount a file as a device; loopback loop (hd0,2)/iso/my.iso.)

ls (lists the contents of a partition/folder; ls, ls /boot/grub, ls (hd0,5)/, ls (hd0,5)/boot.)

lsmod (List loaded modules.)

normal (Activate the normal module, if loaded.)

search (Search for a device. Type help search for the available options.)

set (Review current settings, or set XXX to set a variable such as colors, prefix, root.)

vbeinfo (Display GRUB 2 available resolutions.)

The Rescue Shell.

If you get a rescue shell, this usually means that GRUB failed to load the “normal” module for some reason. It may be possible to work around this temporarily: for instance, if the reason for the failure is that “prefix” is wrong (perhaps it refers to the wrong device, or perhaps the path to “/boot/grub” was not correctly made relative to the device), then you can correct this and enter normal mode manually: Inspect the current prefix (and other preset variables):

set

You will probably have an output more or less like this:

Your output may differ but you get the information required. Find out which devices are available:

ls

Set to the correct value, which might be something like this:

set prefix=(hd0,1)/grub

(this has to be done according to your own drive name)

set root=(hd0,1)

(this has to be performed according to your own drive name.)

insmod normal
normal

The above commands will get you out of the rescue mode to the normal terminal mode. In the terminal mode you have more commands and with increased functionality.
After the above commands you can go ahead and start the rest of the settings.

insmod linux
* linux /vmlinuz root=/dev/sdXY ro

(if this doesn’t work try this)

linux /boot/vmlinuz-3.2.0-14-generic root=/dev/sda1 ro

(optional)

initrd /initrd.img

(Selects the initrd image.)

boot

After Booting in to the system.

Update the grub config file.

sudo update-grub

Reinstallation of grub on the device:

sudo grub-install /dev/sdX

This should the thing for the rescue part and your system should be good and running. If not you can save all your trouble by using Boot Repair. This is the tool used to repair your complete boot menu. It can be downloaded directly and used as a Live Boot CD or DVD. Here is the download link.


Startup Applications: automatic execution of the most used programs during every user login

During every login or bootup, the OS performs a number of tasks in the background to get the OS up and running and ready to be used. Customizations in Linux OS like Ubuntu can be done very easily, that allows an user to add any number of “custom” tasks or programs to the system to be performed every time the user logs in or boots up the OS.

We can choose a certain number of tasks to be automated, thereby reducing the repetitive work of the user to quite an extent. The tasks that can be automated include running a certain program like a custom system check that the user might want to view, or to run applications like the web browser with certain predefined websites. Or it can be automating system control programs that needs to be run during each bootup or even login. Ubuntu allows us to do these kind of automation in a very simple manner, by providing us a GUI based software called the “Startup Applications”.

Though this may provide a lot of convenience, it is important to remember not to overuse this feature. Users might face problems when a large number of tasks are provided or selected to be automated. The main problem this leads to is slowing down your system at startup. Hence, it is very important for the user to NOT over utilise this functionality and only automate the most required or used tasks.

So let’s begin. First thing to do is to open the Startup Applications. To do so, in the desktop Dash, type

Startup Applications

as shown in the image below.

Ubuntu Desktop - Startup applications

Click on the “Startup Applications” icon, and the Startup Applications window opens. It will look similar to the image below. Note that you might have a different set of entries in your window than the ones that can be seen in the image below.

Startup applications preferences

Once this is open, we can start with the automation of tasks. This posts will demonstrate some of the tasks, but many other tasks that are important to you can be added the same way. So here are a few examples

1 Starting a browser with a predefined web page

Every build of Ubuntu comes with Firefox inbuilt. We can use that to open websites that we check regularly. For example, I like to read Linux news, from the website “lxer.com”. To open this website every time, click on the add button present on the upper right side of the Startup Applications window.

Another window opens. In the new window, type the following in the command field:

Firefox “http://www.lxer.com”

Fill out the name as well and use the comment field to describe your new task. An example is shown in the image below. Once that is done, click on the “Add” button and you will see an entry named “lexr Linux news” (in this case) in the Startup Applications window.

Add startup program

This way, a browser can be opened automatically with any website or search query. For example, if the first thing you do is view the trade stock market, then you can click “Add” and enter the command to go directly to a trade website. Example:

Firefox “NASDAQ”

2 Running system management functions automatically

Certain system management functions or programs require to be started each time a user logs in. Consider the situation of system overheating experienced by many Ubuntu users. In this case, most of the users install a software called “TLP”. And in many cases, TLP doesn’t always start on its own automatically. In such a case, rather than to run it manually each time, the Startup Applications can be used to run it automatically, by following the similar steps. So, click on the “Add” button and use the following command in the command field:

sudo tlp start

For the name and the comment field, refer to the image below:

sudo tlp start

Unlike the first example, this example of TLP , the program is started in the background and not visible to the user. Thus in this way, a user can start a variety of background processes automatically that relate to system management functions.

3 Starting system monitoring programs

System monitoring programs are those that monitor and report the various functionalities of the system. An example can be a program to monitor the broadband bandwidth consumption or a custom program written by you to monitor system features like heat of the cpu or cpu utilisation ,etc. These programs are actually running in the background, but unlike the previous example of TLP type of programs, it can be brought to the foreground by either using icons on the top taskbar or an icon on the side taskbar. This too has a similar procedure as the two procedures above. So, click on the “Add” button of the Startup Applications and enter the commands to run it. An example would be the program to monitor cpu frequency and scaling tool. The image below shows an example. The user is also allowed to enter options along with commands.

Edit startup program

4 Editing and removing an automated task

There will be times when an automated task might no longer be needed or you might want to change the website that is loaded. In such cases, you would want to edit or remove the task. There might be situations when you have installed a program that automatically starts by itself and whose entry then can be found in the startup application window. Even that can be removed or edited.

  • To edit a task, simply select on the task to be edited and click on the “Edit” button on the right side of the Startup Applications window. Do the changes in the window that opens.
  • To remove a task, select the task to be removed and click on the “Remove” button. Please note that some of the edited or removed tasks might require a reboot to apply the changes.

Conclusion

We have seen how we can automate many of the user defined tasks to make our job a little bit simpler. The tasks might belong to one of the types shown above or it can be something completely different, but it can be assured that if it is repetitive, it can be automated. The Startup Applications are indeed useful when it comes to running multiple tasks. Still consider that this feature should not be exploited by using it excessively.


How to install and configure PrestaShop on Ubuntu 14.04

How to install and configure PrestaShop on Ubuntu 14.04

Version 1.0

This document describes how to install and configure PrestaShop on Ubuntu 14.04.  PrestaShop is a free, open source e-commerce solution. It supports payment gateways such as DirecPay, Google Checkout, Authorize.Net, Skrill, PayPal, PayPal Payments Pro (Direct) and EBANX Checkout via their respective APIs. Further payment modules are offered commercially.

PrestaShop is available under the Open Software License and officially launched in August 2007. The software, which is written in PHP and based on the Smarty template engine, is currently used by 165,000 shops worldwide. MySQL is the default database engine. PrestaShop is the winner of the 2010 and 2011 Best Open-source Business Application awards.

I do not issue any guarantee that this will work for you!

1 Preliminary Note

This tutorial is based on Ubuntu 14.04 server, so you should set up a basic Ubuntu 14.04 server installation before you continue with this tutorial. The system should have a static IP address. I use 192.168.0.100 as my IP address in this tutorial and server1.example.com as the hostname.  You must have a LAMP server installed in Ubuntu 14.04 as mentioned in the tutorial to continue further.

2 Download

Download the package PrestaShop

cd /tmp
wget http://www.prestashop.com/download/old/prestashop_1.6.0.9.zip

apt-get install unzip

Extract the file in the /var/www/html folder

unzip prestashop_1.6.0.9.zip -d /var/www/html/

Appropriate permissions for PrestaShop needs to be done, as follows:

chown -R www-data:www-data /var/www/html/prestashop/

3 Database initialization

We need a database for PrestaShop, I will create  the database for the PrestaShop as follows:

mysql -u root -p

Here we are adding database=prestashopdb user=prestashopuser and password=prestashoppassword:

CREATE DATABASE prestashopdb;
CREATE USER prestashopuser@localhost IDENTIFIED BY ‘prestashoppassword’;
GRANT ALL PRIVILEGES on prestashopdb.* to prestashopuser@localhost

Further moving ahead:

FLUSH PRIVILEGES;
exit

Restart services

service apache2 restart
service mysql restart

3 Web installation of PrestaShop

Now we will proceed with the PrestaShop web-installation. Open a browser of your choice and open the link http:192.168.0.100/prestashop/install

Select your language and press Next:

Select the check-box for accepting terms and conditions. Press Next:

Here setup will check your system-requirements for the PrestaShop, Press Next:


Now fill the entries as per your choice, as in my case I am using:

Shop name  :  Test-prestashop (Any name of your choice)
Main Activity  :  Computer and hardware ( As per your choice and requirement)
Country  :  Germany (Any value as per your choice)
First Name  :  Srijan (Any value as per your choice)
Last Name  :  Kishore (Any value as per your choice)
Shop password  :  howtoforge (Any value as per your choice)

Next we need to give the entries for the database to be used by PrestaShop, give the values as per the database created at your system. In m y case I will be using these values:

Database server address  :  localhost
Database name  :  prestashopdb
Database login  :  prestashopuser
Database password  :  prestashoppassword
Table prefix  :  ps_  or and value of your choice

After giving the values press Press your database connection now:

It will check the connectivity, after successful connection press Next:

It will initiate the installation.

The above screenshot shows the successful PrestaShop installation.

Next we need to remove the installation folder to proceed further, as follows:

rm -r /var/www/html/prestashop/install/

4 PrestaShop optimization

We can access the backend admin page of PrestaShop at URL http://192.168.0.100/prestashop/admin3403/index.php:

Put the credentials as selected at the time of installation. In my case it was admin@example.com and howtoforge.

It will be your default welcome screen.

Next Goto ADVANCED PARAMETERS, press Clear cache and  within CACHING select Use cache YES and press Save:

Now we are ready for the frontend, we can access it at http://192.168.0.100/prestashop/index.php:

Congratulations! You now we have a fully functional PrestaShop instance on our Ubuntu 14.04 🙂

5 Links

How to limit CPU usage with CPULimit on Ubuntu Linux

How to limit CPU usage with CPULimit on Ubuntu Linux


This document describes how to limit CPU usage in Ubuntu 14.04. I will use CPU-limit utilty for this purpose. Cpulimit is a tool which limits the CPU usage of a process (expressed in percentage, not in CPU time). It is useful to control batch jobs, when you don’t want them to eat too many CPU cycles. The goal of cpulimit is to prevent a process from running for more than a specified time ratio. It does not change the nice value or other scheduling priority settings, but the real CPU usage. Also, it is able to adapt itself to the overall system load, dynamically and quickly.
The control of the used CPU amount is done sending SIGSTOP and SIGCONT POSIX signals to processes.
All the children processes and threads of the specified process will share the same percentage of CPU.

1 Preliminary Note

This tutorial is based on Ubuntu 14.04 server, so you should set up a basic Ubuntu 14.04 server installation before you continue with this tutorial. The system should have a static IP address. I use 192.168.0.100 as my IP address in this tutorial and server1.example.com as the hostname.

2 Installation

Firstly we need to install cpulimit as follows:

apt-get update
apt-get install cpulimit

3 Limiting CPU usage

Now we will check the utility for limiting the CPU usage. For this we will first check the CPU usage without cpulimit and then implement the cpulimit to evaluate the same. Lets make it clear with the example.

  1. Here is an example of how to utilize your CPU with an application in single core CPU:

dd if=/dev/zero of=/dev/null

root@server1:~# dd if=/dev/zero of=/dev/null
[1] 1850
root@server1:~#

Then we will check the CPU usage with command:

top

top – 11:24:18 up 49 min,  1 user,  load average: 0.94, 1.02, 1.79
Tasks: 249 total,   2 running, 247 sleeping,   0 stopped,   0 zombie
%Cpu(s): 13.4 us, 11.6 sy,  0.0 ni, 74.9 id,  0.0 wa,  0.1 hi,  0.0 si,  0.0 st
KiB Mem:   1010540 total,   271652 used,   738888 free,    21760 buffers
KiB Swap:  1048572 total,        0 used,  1048572 free.   158204 cached Mem

  PID USER      PR  NI    VIRT    RES    SHR S  %CPU %MEM     TIME+ COMMAND
1850 root      20   0    7224    616    520 R 100.0  0.1   1:20.33 dd
1851 root      20   0   24952   1756   1180 R   0.3  0.2   0:00.03 top
1 root      20   0   33480   2776   1456 S   0.0  0.3   0:05.31 init
2 root      20   0       0      0      0 S   0.0  0.0   0:00.01 kthreadd

As we can see that CPU usage have gone 100%, now we will use the cpulimit to limit the CPU usage. We can bring up this process to foreground using fg and cancel it with CTRL+C

fg

root@server1:~# fg
dd if=/dev/zero of=/dev/null
^C222182151+0 records in
222182150+0 records out
113757260800 bytes (114 GB) copied, 259.084 s, 439 MB/s

root@server1:~#

Now we can test cpulimit to see if it actually does what it is supposed to. Let test it as follows:

cpulimit -l 30 dd if=/dev/zero of=/dev/null

root@server1:~# cpulimit -l 30 dd if=/dev/zero of=/dev/null
[1] 1852
root@server1:~# Process 1853 detected[1]+  Done                    cpulimit -l 30 dd if=/dev/zero of=/dev/null
root@server1:~#

Now we will check the CPU usage with top command:

top

top – 11:30:54 up 55 min,  1 user,  load average: 0.20, 0.58, 1.34
Tasks: 250 total,   2 running, 247 sleeping,   1 stopped,   0 zombie
%Cpu(s):  4.5 us,  4.1 sy,  0.0 ni, 91.4 id,  0.0 wa,  0.0 hi,  0.0 si,  0.0 st
KiB Mem:   1010540 total,   271944 used,   738596 free,    21816 buffers
KiB Swap:  1048572 total,        0 used,  1048572 free.   158212 cached Mem  PID USER      PR  NI    VIRT    RES    SHR S  %CPU %MEM     TIME+ COMMAND
1853 root      20   0    7224    612    520 T  33.8  0.1   0:35.53 dd
1 root      20   0   33480   2776   1456 S   0.0  0.3   0:05.37 init
2 root      20   0       0      0      0 S   0.0  0.0   0:00.01 kthreadd
3 root      20   0       0      0      0 S   0.0  0.0   0:00.02 ksoftirqd/0
4 root      20   0       0      0      0 S   0.0  0.0   0:00.00 kworker/0:0

Now you can see  that the CPU usage have decreased from 100% to 33.8% almost 30%. So we have successfully checked the utility cpulimit which is able to limit the usage of CPU consumption in a single core Ubuntu distro.

  1. Here is an example of how to utilize your CPU with an application in multiple core CPU:

For checking your CPU core use the command:

nproc

 In my case it is CPU core count was 4.
Now we will proceed to check the CPU usage without cpulimit in all 4 cores for the an application as follows:

for j in `seq 1 4`; do dd if=/dev/zero of=/dev/null done

It will run the command utilizing all the cores and yeild the output as:

root@server1:~# for j in `seq 1 4`; do dd if=/dev/zero of=/dev/null done
[1] 1263
[2] 1264
[3] 1265
[4] 1266
root@server1:~#

Now check the CPU usage with top command:

top

top – 11:47:45 up 4 min,  1 user,  load average: 3.63, 1.53, 0.57
Tasks: 290 total,   5 running, 285 sleeping,   0 stopped,   0 zombie
%Cpu0  : 48.3 us, 51.3 sy,  0.0 ni,  0.0 id,  0.0 wa,  0.3 hi,  0.0 si,  0.0 st
%Cpu1  : 47.8 us, 52.2 sy,  0.0 ni,  0.0 id,  0.0 wa,  0.0 hi,  0.0 si,  0.0 st
%Cpu2  : 53.3 us, 46.4 sy,  0.0 ni,  0.0 id,  0.0 wa,  0.3 hi,  0.0 si,  0.0 st
%Cpu3  : 52.0 us, 48.0 sy,  0.0 ni,  0.0 id,  0.0 wa,  0.0 hi,  0.0 si,  0.0 st
KiB Mem:   1010540 total,   209712 used,   800828 free,    20276 buffers
KiB Swap:  1048572 total,        0 used,  1048572 free.    93632 cached Mem

  PID USER      PR  NI    VIRT    RES    SHR S  %CPU %MEM     TIME+ COMMAND
1263 root      20   0    7224    612    520 R 100.0  0.1   2:21.40 dd
1264 root      20   0    7224    616    520 R 100.0  0.1   2:21.41 dd
1265 root      20   0    7224    612    520 R  99.0  0.1   2:21.03 dd
1266 root      20   0    7224    616    520 R  98.0  0.1   2:20.82 dd
1281 root      20   0  104416   3992   2920 S   1.0  0.4   0:00.03 sshd
1283 root      20   0  104416   3988   2920 S   1.0  0.4   0:00.03 sshd
1279 root      20   0  104556   4008   2924 S   0.7  0.4   0:00.08 sshd

The dd command is consuming almost 100% CPU of all the cores.  Next we will check the command with the cpulimit utility. For this kill previous traces for the dd command as follows:

killall dd

root@server1:~# killall dd
[1]   Terminated              dd if=/dev/zero of=/dev/null
[3]-  Terminated              dd if=/dev/zero of=/dev/null
[2]-  Terminated              dd if=/dev/zero of=/dev/null
[4]+  Terminated              dd if=/dev/zero of=/dev/null
root@server1:~#

Now use cpulimit with the same command as follows:

for j in `seq 1 4`; do cpulimit -l 20 dd if=/dev/zero of=/dev/null done

root@server1:~# for j in `seq 1 4`; do cpulimit -l 20 dd if=/dev/zero of=/dev/null done
[1] 1429
[2] 1430
[3] 1431
[4] 1432
root@server1:~# Process 1434 detected
Process 1433 detected
Process 1437 detected
Process 1439 detected

[1]   Done                    cpulimit -l 20 dd if=/dev/zero of=/dev/null
[2]   Done                    cpulimit -l 20 dd if=/dev/zero of=/dev/null
[3]-  Done                    cpulimit -l 20 dd if=/dev/zero of=/dev/null
[4]+  Done                    cpulimit -l 20 dd if=/dev/zero of=/dev/null
root@server1:~#

Now check the CPU usage wit the cpulimit utility.

top

top – 11:59:10 up 16 min,  2 users,  load average: 0.47, 0.71, 0.81
Tasks: 256 total,   2 running, 251 sleeping,   3 stopped,   0 zombie
%Cpu0  :  2.0 us,  2.0 sy,  0.0 ni, 96.0 id,  0.0 wa,  0.0 hi,  0.0 si,  0.0 st
%Cpu1  : 26.2 us, 22.8 sy,  0.0 ni, 50.7 id,  0.0 wa,  0.3 hi,  0.0 si,  0.0 st
%Cpu2  : 14.0 us, 12.3 sy,  0.0 ni, 73.8 id,  0.0 wa,  0.0 hi,  0.0 si,  0.0 st
%Cpu3  : 13.3 us, 11.6 sy,  0.0 ni, 75.1 id,  0.0 wa,  0.0 hi,  0.0 si,  0.0 st
KiB Mem:   1010540 total,   204064 used,   806476 free,    20408 buffers
KiB Swap:  1048572 total,        0 used,  1048572 free.    98340 cached Mem

  PID USER      PR  NI    VIRT    RES    SHR S  %CPU %MEM     TIME+ COMMAND
1433 root      20   0    7224    612    520 T  28.2  0.1   0:12.00 dd
1439 root      20   0    7224    616    520 R  26.6  0.1   0:12.13 dd
1434 root      20   0    7224    612    520 T  25.3  0.1   0:11.97 dd
1437 root      20   0    7224    612    516 T  22.9  0.1   0:11.93 dd
7 root      20   0       0      0      0 S   0.3  0.0   0:00.22 rcu_sched
8 root      20   0       0      0      0 S   0.3  0.0   0:00.21 rcuos/0

As you can see above that the CPU usage is limited from 100%  to 20% almost for multiple core CPUs.

Congratulations! We have successfully tested the cpulimit for limiting the CPU usage in Ubuntu 14.04 🙂

4 Links