How to Install and Configure TaskBoard on Ubuntu 18.04 LTS

TaskBoard is an open source Kanban-inspired app that can be used to keep track of things that need to get done. It comes with a built-in web interface for keeping track of tasks. It is simple, easy to install and works on almost any web hosts. TaskBoard allows you to create unlimited board, projects and customize columns within boards. TaskBoard provides lots of features such as, basic user management, RESTful API, Items display complete history of activities and Full history of all board activity.

In this tutorial, we will learn how to install TaskBoard on Ubuntu 18.04 server.

Requirements

  • A server running Ubuntu 18.04.
  • A root password is set up to your server.

Getting Started

The first step is to become the root user on your system. To do so, run the command:

sudo -s

Before starting, you will need to update your system with the latest version. You can do this by running the following command:

sudo apt-get update -y
sudo apt-get upgrade -y

Once your server is updated, restart your server to apply the changes.

Install Java

First, you will need to install java to your system. By default, the latest version of Java is not available in the Ubuntu 18.04 default repository. So, you will need to add the java repository first.

You can do this with the following command:

add-apt-repository ppa:webupd8team/java

Once the repository is installed, you can install the java with the following command:

apt-get install oracle-java8-installer -y

After installing Java, check the version of java with the following command:

java -version

You should see the following output:

java version "1.8.0_201"
Java(TM) SE Runtime Environment (build 1.8.0_201-b09)
Java HotSpot(TM) 64-Bit Server VM (build 25.201-b09, mixed mode)

Once you have done, you can proceed to the next step.

Install Apache, SQLite, and PHP

TaskBoard runs on a web server, written in PHP and use SQLite to store their data. So, you will need to install Apache, SQLite, PHP and other required dependencies to your server. You can install all of them with the following command:

apt-get install apache2 sqlite3 php7.2 libapache2-mod-php7.2 php7.2-cli php7.2-common php7.2-json php7.2-readline php7.2-sqlite3 libaio1 libapr1 libhtml-template-perl libaprutil1-dbd-sqlite3 libaprutil1-ldap libaprutil1 libdbi-perl libterm-readkey-perl curl libwrap0 unzip wget -y

Once all the packages are installed, start apache service and enable it to start on boot with the following command:

systemctl start apache2
systemctl enable apache2

Install TaskBoard

First, download the latest version of TaskBoard from Git repository with the following command:

cd /tmp
wget https://github.com/kiswa/TaskBoard/archive/master.zip

Once the download is completed, extract the downloaded file with the following command:

unzip master.zip

Next, move the extracted directory to the Apache web root directory with the following command:

mv TaskBoard-master /var/www/html/taskboard

Next, change the directory to the taskboard and update the composer with the following command:

cd /var/www/html/taskboard
./build/composer.phar self-update

You should see the following output:

Updating to version 522ea033a3c6e72d72954f7cd019a3b75e28f391.
    Downloading: 100%         
Use composer self-update --rollback to return to version feefd51565bb8ead38e355b9e501685b5254d0d5

Next, install the php dependencies with composer by running the following command:

./build/composer.phar install

You should see the following output:

Do not run Composer as root/super user! See https://getcomposer.org/root for details
Loading composer repositories with package information
Installing dependencies (including require-dev) from lock file
Package operations: 5 installs, 0 updates, 0 removals
  - Installing firebase/php-jwt (1.0.0): Downloading (100%)         
  - Installing gabordemooij/redbean (v4.2.1): Downloading (100%)         
  - Installing ircmaxell/password-compat (v1.0.4): Downloading (100%)         
  - Installing phpmailer/phpmailer (v5.2.14): Downloading (100%)         
  - Installing slim/slim (2.6.2): Downloading (100%)         
phpmailer/phpmailer suggests installing league/oauth2-client (Needed for XOAUTH2 authentication)
phpmailer/phpmailer suggests installing league/oauth2-google (Needed for Gmail XOAUTH2)
slim/slim suggests installing ext-mcrypt (Required for HTTP cookie encryption)
Generating autoload files

Next, build JavaScript and CSS with the following command:

./build/build-all

You should see the following output:

Building...
 Installing dependencies
Do not run Composer as root/super user! See https://getcomposer.org/root for details
Loading composer repositories with package information
Installing dependencies (including require-dev) from lock file
Nothing to install or update
Generating autoload files
 Compiling lib JS files...
 Minifying lib CSS files...
 Compiling app JS files...
 Minifying app CSS files...
 Updating index.html...
Build Complete

Next, give proper permissions to the taskboard directory with the following command:

chown -R www-data:www-data /var/www/html/taskboard
chmod -R 755 /var/www/html/taskboard

Once you have done, you can proceed to configure Apache for TaskBoard.

Configure Apache for TaskBoard

Next, you will need to create an Apache virtual host file for TaskBoard. You can do it with the following command:

nano /etc/apache2/sites-available/taskboard.conf

Add the following lines:

 VirtualHost *:80
    ServerAdmin [email protected]
    DocumentRoot "/var/www/html/taskboard"
    ServerName 1example.com
    Directory "/var/www/html/taskboard"
        Options Indexes FollowSymLinks
        AllowOverride All
        Require all granted
    /Directory
    ErrorLog "/var/log/apache2/taskboard-error_log"
    CustomLog "/var/log/apache2/taskboard-access_log" combined
/VirtualHost

Save and close the file. Then, enable the virtual host file with the following command:

a2ensite taskboard.conf

Next, enable Apache rewrite module and restart Apache web service with the following command:

a2enmod rewrite
systemctl restart apache2

Access TaskBoard

TaskBoard is now installed and configured, it’s time to access TaskBoard web interface.

Open your web browser and type the URL http://example.com. You will be redirected to the following page:

Provide default administrator username and password as admin / admin and click on the Sign In button. You should see the following page:

Now, click on the Settings button and change the default password as you wish, then click on the Update password button. Next, click on the Add Board button, you should see the following page:

Next, provide Board Name and Columns and click on the + button, you should see the following page:

Now, click on the Add Board button to add the board.

Next, navigate to home page and select your newly created board. You should see the following page:

Congratulations! you have successfully installed TaskBoard on Ubuntu 18.04 server. You can now keep track of your task using TaskBoard. Feel free to ask me if you have any questions.

How to Install Shopware with NGINX and Let’s Encrypt on CentOS 7

Shopware is the next generation of open source e-commerce software. Based on bleeding edge technologies like Symfony 3, Doctrine2 and Zend Framework Shopware comes as the perfect platform for your next e-commerce project. This tutorial will walk you through the Shopware Community Edition (CE) installation on CentOS 7 system by using NGINX as a web server.

Requirements

Make sure your system meets the following minimum requirements:

  • Linux-based operating system with NGINX or Apache 2.x (with mod_rewrite) web server installed.
  • PHP 5.6.4 or higher with ctype, gd, curl, dom, hash, iconv, zip, json, mbstring, openssl, session, simplexml, xml, zlib, fileinfo, and pdo/mysql extensions. PHP 7.1 or above is strongly recommended.
  • MySQL 5.5.0 or higher.
  • Possibility to set up cron jobs.
  • Minimum 4 GB available hard disk space.
  • IonCube Loader version 5.0.0 or higher (optional).

NOTE: Shopware is currently up to PHP 7.2.x compatible.

Prerequisites

  • An operating system running CentOS 7.
  • A non-root user with sudo privileges.

Initial steps

Check your CentOS version:

cat /etc/centos-release

Set up the timezone:

timedatectl list-timezones
sudo timedatectl set-timezone 'Region/City'

Update your operating system packages (software). This is an important first step because it ensures you have the latest updates and security fixes for your operating system’s default software packages:

sudo yum update -y

Install some essential packages that are necessary for basic administration of the CentOS operating system:

sudo yum install -y curl wget vim unzip socat epel-release

Step 1 – Install PHP and PHP extensions

Setup the Webtatic YUM repo:

sudo rpm -Uvh https://mirror.webtatic.com/yum/el7/webtatic-release.rpm

Install PHP, as well as the necessary PHP extensions for Shopware:

sudo yum install -y php72w php72w-cli php72w-fpm php72w-common php72w-mysql php72w-curl php72w-json php72w-zip php72w-gd php72w-xml php72w-mbstring php72w-opcache

To show PHP compiled in modules, you can run:

php -m

ctype
curl
exif
fileinfo
. . .
. . .


Check the PHP version:

php --version
# PHP 7.2.14 (cli) (built: Jan 12 2019 12:47:33) ( NTS )
# Copyright (c) 1997-2018 The PHP Group
# Zend Engine v3.0.0, Copyright (c) 1998-2017 Zend Technologies
#     with Zend OPcache v7.2.14, Copyright (c) 1999-2018, by Zend Technologies

Start and enable PHP-FPM service:

sudo systemctl start php-fpm.service
sudo systemctl enable php-fpm.service

We can move on to the next step, which is the IonCube Loader installation.

Step 2 – Install IonCube Loader (optional)

Download IonCube Loader:

cd /tmp  wget https://downloads.ioncube.com/loader_downloads/ioncube_loaders_lin_x86-64.tar.gz

Extract the loader:

tar xfz ioncube_loaders_lin_*.gz

Find the PHP extensions directory on the system by running the command below:

php -i | grep extension_dir
# extension_dir = /usr/lib64/php/modules = /usr/lib64/php/modules

Copy the ionCube Loader into the PHP extensions directory:

sudo cp /tmp/ioncube/ioncube_loader_lin_7.2.so /usr/lib64/php/modules

Include the loader via PHP configuration:

sudo vim /etc/php.ini

Then add a line in the file to include ionCube loader. It can be anywhere in the file below [PHP] line:

zend_extension = /usr/lib64/php/modules/ioncube_loader_lin_7.2.so

Save the file and restart PHP-FPM:

sudo systemctl restart php-fpm.service

Step 3 – Install MariaDB and create a database for Shopware

Install MariaDB database server:

sudo yum install -y mariadb-server

Check the MariaDB version:

mysql --version
# mysql  Ver 14.14 Distrib 5.7.26, for Linux (x86_64) using  EditLine wrapper

Start and enable MariaDB service:

sudo systemctl start mariadb.service
sudo systemctl enable mariadb.service

Run mysql_secure installation script to improve MariaDB security and set the password for MariaDB root user:

sudo mysql_secure_installation

Answer each of the questions:

Would you like to setup VALIDATE PASSWORD plugin? N
New password: your_secure_password
Re-enter new password: your_secure_password
Remove anonymous users? [Y/n] Y
Disallow root login remotely? [Y/n] Y
Remove test database and access to it? [Y/n] Y
Reload privilege tables now? [Y/n] Y

Connect to MariaDB shell as the root user:

sudo mysql -u root -p
# Enter password

Create an empty MariaDB database and user for Shopware and remember the credentials:

mysql CREATE DATABASE dbname;
mysql GRANT ALL ON dbname.* TO 'username' IDENTIFIED BY 'password';
mysql FLUSH PRIVILEGES;

Exit from MariaDB:

mysql exit

Replace dbname, username and password with your own names.

Step 4 – Install Acme.sh client and obtain Let’s Encrypt certificate (optional)

Securing your website with HTTPS is not necessary, but it is a good practice to secure your site traffic. In order to obtain a TLS certificate from Let’s Encrypt we will use acme.sh client. Acme.sh is a pure Unix shell software for obtaining TLS certificates from Let’s Encrypt with zero dependencies.

Download and install acme.sh:

sudo su - root
git clone https://github.com/Neilpang/acme.sh.git
cd acme.sh 
./acme.sh --install --accountemail [email protected]
source ~/.bashrc
cd ~

Check acme.sh version:

acme.sh --version
# v2.8.1

Obtain RSA and ECC/ECDSA certificates for your domain/hostname:

# RSA 2048
acme.sh --issue --standalone -d example.com --keylength 2048
# ECDSA
acme.sh --issue --standalone -d example.com --keylength ec-256

If you want fake certificates for testing you can add –staging flag to the above commands.

After running the above commands, your certificates and keys will be in:

  • For RSA: /home/username/example.com directory.
  • For ECC/ECDSA: /home/username/example.com_ecc directory.

To list your issued certs you can run:

acme.sh --list

Create a directory to store your certs. We will use a directory /etc/letsencrypt.

mkdir -p /etc/letsecnrypt/example.com
sudo mkdir -p /etc/letsencrypt/example.com_ecc

Install/copy certificates to /etc/letsencrypt directory.

# RSA
acme.sh --install-cert -d example.com --cert-file /etc/letsencrypt/example.com/cert.pem --key-file /etc/letsencrypt/example.com/private.key --fullchain-file /etc/letsencrypt/example.com/fullchain.pem --reloadcmd "sudo systemctl reload nginx.service"
# ECC/ECDSA
acme.sh --install-cert -d example.com --ecc --cert-file /etc/letsencrypt/example.com_ecc/cert.pem --key-file /etc/letsencrypt/example.com_ecc/private.key --fullchain-file /etc/letsencrypt/example.com_ecc/fullchain.pem --reloadcmd "sudo systemctl reload nginx.service"

All the certificates will be automatically renewed every 60 days.

After obtaining certs exit from root user and return back to normal sudo user:

exit

Step 5 – Install and configure NGINX

Install the NGINX web server:

sudo yum install -y nginx

Check the NGINX version:

nginx -v

Start and enable Nginx service:

sudo systemctl start nginx.service
sudo systemctl enable nginx.service

Configure NGINX for Shopware. Run sudo vim /etc/nginx/conf.d/shopware.conf and add the following configuration:

server {
    listen 80;
    listen 443 ssl;
    
    server_name example.com;
    root /var/www/shopware;
    ssl_certificate /etc/letsencrypt/example.com/fullchain.cer;
    ssl_certificate_key /etc/letsencrypt/example.com/example.com.key;
    ssl_certificate /etc/letsencrypt/example.com_ecc/fullchain.cer;
    ssl_certificate_key /etc/letsencrypt/example.com_ecc/example.com.key;
    index shopware.php index.php;

    location / {
        try_files $uri $uri/ /shopware.php$is_args$args;
    }

    location /recovery/install {
      index index.php;
      try_files $uri /recovery/install/index.php$is_args$args;
    }

    location ~ .php$ {
        include fastcgi.conf;
        fastcgi_pass 127.0.0.1:9000;
    }
}

Check NGINX configuration for syntax errors:

sudo nginx -t

Reload NGINX service:

sudo systemctl reload nginx.service

Step 6 – Install Shopware

Create a document root directory for Shopware:

sudo mkdir -p /var/www/shopware

Change ownership of the /var/www/shopware directory to {jour_user}:

sudo chown -R {your_user}:{your_user} /var/www/shopware

Navigate to the document root directory:

cd /var/www/shopware

Download and unzip the latest Shopware release via wget:

wget https://releases.shopware.com/install_5.5.8_d5bf50630eeaacc6679683e0ab0dcba89498be6d.zip?_ga=2.141661361.269357371.1556739808-1418008019.1556603459 -O shopware.zip
unzip shopware.zip
rm shopware.zip

NOTE: Update download URL if there is a newer release.

Change ownership of the /var/www/shopware directory to nginx.

sudo chown -R nginx:nginx /var/www/shopware

Run sudo vim /etc/php-fpm.d/www.conf and set user and group to nginx.

sudo vim /etc/php-fpm.d/www.conf
# user = nginx
# group = nginx

Create /var/lib/php/session directory and change its ownership to a user nginx.

sudo mkdir -p /var/lib/php/session  sudo chown -R nginx:nginx /var/lib/php/session

Increase memory_limit = 256M and upload_max_filesize = 6M, and set allow_url_fopen = On if not already set in /etc/php.ini file.

sudo vim /etc/php.ini

After making changes in /etc/php.ini file, reload php-fpm.service:

sudo systemctl reload php-fpm.service

Open your domain/IP in the web browser and follow the installation wizard. The backend of Shopware is located at /backend example: http://example.com/backend.

Step 7 – Complete the Shopware setup

Start by selecting the language and click Next:

Shopware setup wizard

Next, make sure you meet all the Shopware requirements:

System requirements are met

Agree with Shopware TOS and click Next:

Accept license

Enter database credentials and click Next:

Shopware database settings

Start the installation to create database tables:

Installing database tables

After that, you will see a message about successful database import:

Database initialization successful

Choose a license and click Next:

Choose license

Fill in a few basic settings to finish up the setup and click Next:

Basic settings

Installation is complete.

Installation is complete

To access admin area append /backend to your URL.

Shopware backend login

You have successfully installed Shopware. Enjoy your new online shop!

.htaccess redirect

#301 Redirects for .htaccess

#Redirect a single page:
Redirect 301 /pagename.php http://www.domain.com/pagename.html

#Redirect an entire site:
Redirect 301 / http://www.domain.com/

#Redirect an entire site to a sub folder
Redirect 301 / http://www.domain.com/subfolder/

#Redirect a sub folder to another site
Redirect 301 /subfolder http://www.domain.com/

#This will redirect any file with the .html extension to use the same filename but use the .php extension instead.
RedirectMatch 301 (.*)\.html$ http://www.domain.com$1.php

##
#You can also perform 301 redirects using rewriting via .htaccess.
##

#Redirect from old domain to new domain
RewriteEngine on
RewriteBase /
RewriteRule (.*) http://www.newdomain.com/$1 [R=301,L]

#Redirect to www location
RewriteEngine on
RewriteBase /
rewritecond %{http_host} ^domain.com [nc]
rewriterule ^(.*)$ http://www.domain.com/$1 [r=301,nc]

#Redirect to www location with subdirectory
RewriteEngine on
RewriteBase /
RewriteCond %{HTTP_HOST} domain.com [NC]
RewriteRule ^(.*)$ http://www.domain.com/directory/index.html [R=301,NC]

#Redirect from old domain to new domain with full path and query string:
Options +FollowSymLinks
RewriteEngine On
RewriteRule ^(.*) http://www.newdomain.com%{REQUEST_URI} [R=302,NC]

#Redirect from old domain with subdirectory to new domain w/o subdirectory including full path and query string:
Options +FollowSymLinks
RewriteEngine On
RewriteCond %{REQUEST_URI} ^/subdirname/(.*)$
RewriteRule ^(.*) http://www.katcode.com/%1 [R=302,NC]

Rewrite and redirect URLs with query parameters (files placed in root directory)

Original URL:

http://www.example.com/index.php?id=1
Desired destination URL:

http://www.example.com/path-to-new-location/
.htaccess syntax:

RewriteEngine on
RewriteCond %{QUERY_STRING} id=1
RewriteRule ^index\.php$ /path-to-new-location/? [L,R=301]
Redirect URLs with query parameters (files placed in subdirectory)

Original URL:

http://www.example.com/sub-dir/index.php?id=1
Desired destination URL:

http://www.example.com/path-to-new-location/
.htaccess syntax:

RewriteEngine on
RewriteCond %{QUERY_STRING} id=1
RewriteRule ^sub-dir/index\.php$ /path-to-new-location/? [L,R=301]
Redirect one clean URL to a new clean URL

Original URL:

http://www.example.com/old-page/
Desired destination URL:
http://www.example.com/new-page/
.htaccess syntax:

RewriteEngine On
RewriteRule ^old-page/?$ $1/new-page$2 [R=301,L]
Rewrite and redirect URLs with query parameter to directory based structure, retaining query string in URL root level

Original URL:

http://www.example.com/index.php?id=100
Desired destination URL:

http://www.example.com/100/
.htaccess syntax:

RewriteEngine On
RewriteRule ^([^/d]+)/?$ index.php?id=$1 [QSA]
Rewrite URLs with query parameter to directory based structure, retaining query string parameter in URL subdirectory

Original URL:
http://www.example.com/index.php?category=fish
Desired destination URL:
http://www.example.com/category/fish/
.htaccess syntax:

RewriteEngine On
RewriteRule ^/?category/([^/d]+)/?$ index.php?category=$1 [L,QSA]
Domain change – redirect all incoming request from old to new domain (retain path)

RewriteEngine on
RewriteCond %{HTTP_HOST} ^example-old\.com$ [NC]
RewriteRule ^(.*)$ http://www.example-new.com/$1 [R=301,L]
If you do not want to pass the path in the request to the new domain, change the last row to:

RewriteRule ^(.*)$ http://www.example-new.com/ [R=301,L]

#From blog.oldsite.com -> www.somewhere.com/blog/
retains path and query, and eliminates xtra blog path if domain is blog.oldsite.com/blog/
Options +FollowSymLinks
RewriteEngine On
RewriteCond %{REQUEST_URI}/ blog
RewriteRule ^(.*) http://www.somewhere.com/%{REQUEST_URI} [R=302,NC]
RewriteRule ^(.*) http://www.somewhere.com/blog/%{REQUEST_URI} [R=302,NC]

How to Install WonderCMS on Ubuntu 18.04 LTS

WonderCMS is a free and open source flat file CMS, aimed to be extremely small, light and simple. It’s built with PHP, jQuery, HTML/CSS and developed since 2008. No initial configuration required. The installation process is pretty straightforward – unzip and upload 5 files. All files can be easily moved, backed up and restored by copy/pasting all files to another location. Moving them to another host does not require any re-configuration. WonderCMS also doesn’t require a traditional/relational database like MySQL. The flat file technology enables WonderCMS to save all data to a text file (flat file) called database.js which is structured in JSON format. In this tutorial, we will go through the WonderCMS installation and setup on Ubuntu 18.04 LTS system by using Nginx as a web server, and optionally you can secure transport layer by using Acme.sh client and Let’s Encrypt certificate authority to add SSL support.

Requirements

Requirements for installing and running WonderCMS are:

  • PHP version 7.1 or greater with the curl, mbstring and zip extensions.
  • Web server (Apache with mod_rewrite module enabled, Nginx, IIS).

Prerequisites

  • An Ubuntu 18.04 LTS operating system.
  • A non-root user with sudo privileges.

Initial steps

Check your Ubuntu version:

lsb_release -ds
# Ubuntu 18.04.2 LTS

Set up the timezone:

sudo dpkg-reconfigure tzdata

Update your operating system packages (software). This is an important first step because it ensures you have the latest updates and security fixes for your operating system’s default software packages:

sudo apt update  sudo apt upgrade -y

Install some essential packages that are necessary for basic administration of Ubuntu operating system:

sudo apt install -y curl wget vim git unzip socat bash-completion apt-transport-https

Step 1 – Install PHP and necessary PHP extensions

Install PHP, as well as the necessary PHP extensions:

sudo apt install -y php7.2 php7.2-cli php7.2-fpm php7.2-common php7.2-curl php7.2-zip php7.2-mbstring

To show PHP compiled in modules, you can run:

php -m

ctype
curl
exif
fileinfo
. . .
. . .

Check the PHP version:

php --version

# PHP 7.2.17-0ubuntu0.18.04.1 (cli) (built: Apr 18 2019 14:12:38) ( NTS )
# Copyright (c) 1997-2018 The PHP Group
# Zend Engine v3.2.0, Copyright (c) 1998-2018 Zend Technologies
# with Zend OPcache v7.2.10-0ubuntu0.18.04.1, Copyright (c) 1999-2018, by Zend Technologies

PHP-FPM service is automatically started and enabled on reboot on Ubuntu 18.04 system, so there is no need to start and enable it manually. We can move on to the next step, which is the SSL setup.

Step 2 – Install acme.sh client and obtain Let’s Encrypt certificate ( optional )

Securing your forum with HTTPS is not necessary, but it is a good practice to secure your site traffic. In order to obtain a TLS certificate from Let’s Encrypt we will use acme.sh client. Acme.sh is a pure UNIX shell software for obtaining TLS certificates from Let’s Encrypt with zero dependencies.

Download and install acme.sh:

sudo su - root
git clone https://github.com/Neilpang/acme.sh.git
cd acme.sh 
./acme.sh --install --accountemail [email protected]
source ~/.bashrc
cd ~

Check acme.sh version:

acme.sh --version
# v2.8.0

Obtain RSA and ECC/ECDSA certificates for your domain/hostname:

# RSA 2048
acme.sh --issue --standalone -d example.com --keylength 2048
# ECDSA
acme.sh --issue --standalone -d example.com --keylength ec-256

If you want fake certificates for testing you can add --staging flag to the above commands.

After running the above commands, your certificates and keys will be in:

  • For RSA: /home/username/example.com directory.
  • For ECC/ECDSA: /home/username/example.com_ecc directory.

To list your issued certs you can run:

acme.sh --list

Create a directory to store your certs. We will use /etc/letsencrypt directory.

mkdir -p /etc/letsecnrypt/example.com sudo mkdir -p /etc/letsencrypt/example.com_ecc

Install/copy certificates to /etc/letsencrypt directory.

# RSA
acme.sh --install-cert -d example.com --cert-file /etc/letsencrypt/example.com/cert.pem --key-file /etc/letsencrypt/example.com/private.key --fullchain-file /etc/letsencrypt/example.com/fullchain.pem --reloadcmd "sudo systemctl reload nginx.service"
# ECC/ECDSA
acme.sh --install-cert -d example.com --ecc --cert-file /etc/letsencrypt/example.com_ecc/cert.pem --key-file /etc/letsencrypt/example.com_ecc/private.key --fullchain-file /etc/letsencrypt/example.com_ecc/fullchain.pem --reloadcmd "sudo systemctl reload nginx.service"

All the certificates will be automatically renewed every 60 days.

After obtaining certs exit from root user and return back to normal sudo user:

exit

Step 3 – Install and configure NGINX

WonderCMS can work fine with many popular web server software. In this tutorial, we selected NGINX.

Install NGINX:

sudo apt install -y nginx

Check the NGINX version:

sudo nginx -v
# nginx version: nginx/1.14.0 (Ubuntu)

Next, configure NGINX for WonderCMS. Run sudo vim /etc/nginx/sites-available/wondercms.conf and add the following configuration:

server {
  
  listen 80;

  server_name example.com;
  root /var/www/wondercms;

  index index.php;


  location / {
    if (!-e $request_filename) {
      rewrite ^/(.+)$ /index.php?page=$1 last;
    }
  }
  location ~ database.js {
    return 403;
  }

  location ~ .php(/|$) {
    include snippets/fastcgi-php.conf;
    fastcgi_pass unix:/var/run/php/php7.2-fpm.sock;
  }

}

Activate the new wondercms.conf configuration by linking the file to the sites-enabled directory:

sudo ln -s /etc/nginx/sites-available/wondercms.conf /etc/nginx/sites-enabled/

Check NGINX configuration for syntax errors:

sudo nginx -t

Reload NGINX service:

sudo systemctl reload nginx.service

Step 4 – Install WonderCMS

Create a document root directory for WonderCMS.

sudo mkdir -p /var/www/wondercms

Change ownership of the /var/www/wondercms directory to [jour_username]:

sudo chown -R [your_username]:[your_username] /var/www/wondercms

Navigate to the document root directory:

cd /var/www/wondercms

Download and unzip WonderCMS source:

wget https://github.com/robiso/wondercms/releases/download/2.7.0/WonderCMS-2.7.0.zip
unzip WonderCMS-2.7.0.zip
rm WonderCMS-2.7.0.zip

Move WonderCMS files to document root directory.

mv wondercms/* .  mv wondercms/.*.
rmdir wondercms

Change ownership of the /var/www/wondercms directory to www-data:

sudo chown -R www-data:www-data /var/www/wondercms

Open your site in a web browser and log in with default password admin and change the default password afterward.

Links

Popular Linux Distributions for Security Testing

In this article, we will show you some special purpose Linux distributions for performing security-related tasks. They will all have a Linux base of Debian or Ubuntu along with some built-in custom tools. Linux is the go-to choice for security testing dues to the advantages it offers. This popularity is the prime reason for having many distributions built on it. Here are some of the tasks that you can perform with the help of Linux distros:

  • System and network security
  • Security analysis
  • Ethical hacking
  • Penetration testing
  • Digital forensic
  • Security audits

This article will discuss some of the popular Linux distros which can help you get started. You can try all of these and choose the one that works best for you:

Kali Linux

Kali was first introduced in 2012 as a Debian-based distribution, released with over 300 specialized tools for penetration testing and digital forensics. It uses the rolling release model that makes sure that any tool you use for security testing will always be up to date. It is a rewrite of BackTrackand maintained and funded by Offensive Security Ltd.

Kali is free to use and can run natively as a virtual machine or even as a live boot. The live boot is an exceptional advantage when using Kali for penetration testing and digital forensics. Kali supports a plethora of devices and hardware platforms, including VMware and ARM. It is rightly considered as one of the best and sophisticated penetration testing platforms available today, with a large and active community helping to make it better and more advanced.

Backbox

BackBox Linux is one of the most popular distros for security and penetration testing. It is an Ubuntu-based operating system with a plethora of security analysis tools that can be used for network and system analysis, exploitations and vulnerability analysis, forensics, and much more. Its main advantage is that it is light-weight, swift, simplified, and comes with a complete XFCE desktop environment.

Backbox is also compatible with older hardware, highly customizable, and has its own software repository with applications updated regularly with the most stable versions. Lastly, Backboxenjoys the support of a vast community, which has also made it one of the most effective distros to work on. 

Parrot Security

Parrot Security is a Debian-based distro developed by the frozen box team, which uses Kali repositories for updating the tool. Designed for cryptography, penetration testing, vulnerability testing, and digital forensics, Parrot Security is a lightweight system that is cloud-friendly, effective, highly customizable, and enjoys robust community support.

Parrot Security can be used from a rookie developer to the most pro developer for security testing. It uses MATE as its desktop environment; works on a minimum of 256MB RAM, and is available with both 32 and 64bitprocessors.

BlackArch

BlackArchis one of the most sophisticated Linux distribution for security testing and ethical hacking. Derived from Arch Linux, BlackArch has a huge tool repository with 2000+ tools. It is lightweight and compatible with Arch install existing currently. However, this distro is suitable only for a pro developer and not for a newbie. 

Samurai Web Testing Framework

Samurai Web Testing framework is an Ubuntu-based framework created with keeping web penetration testing in mind. It is a live Linux environment which comes with pre-installed to work as a platform for penetration testing and free open source tools. It can be used as a virtual machine along with the support of Virtualbox and VMWare.

Pentoo Linux

Pentoo Linux, which can be based an overlay on Gentoo Linux, is developed with a focus on penetration testing. It offers support to 32 and 64-bit processors and is available for alive boot session via a CD or a USB player. Pentoo comes with a lot of tools for security testing ranging from scanners, web application testing, analyzing, exploitation, and much more. It is an XFCE-based distribution with lots of of kernel features and is continuously updated by various developers.

DEFT

DEFT, which stands for Digital Evidence and Forensic Toolkit, is a specialized Linux distro for digital forensics. This open source distribution is Ubuntu based and paired with DART. DEFT is based on GNU Linux and its tools are focused around forensics. It uses anLXDE desktop environment and WINEfor executing Windows. DEFT can be run live or via a virtual machine and is made for running a live system without damaging the devices connected to the PC where the booting takes place via any tampering or corrupting.

You now have a fair idea about some of the most popular Linux distros for security testing. While this is by no means a comprehensive list, there are various other distros that you can work with and are equally good to work with. Some of them include:

  • Caine
  • Fedora Security Spin
  • Bugtraq
  • Network Security Toolkit
  • ArchStrike
  • Cyborg Linux
  • Matriux
  • Weakerth4n
  • NodeZero Linux
  • Santoku

These are also some of the favorites among developers. In the end, the choice depends on the requirement of the developer or the security professional.

This article was written to give you a brief idea about some of the best distros available today. If you choose to work with Kali Linux among them, we have just the right book to help you get started. Kali Linux – An Ethical Hacker’s Cookbook – Second Edition will help you discover end-to-end penetration testing solutions for enhancing your ethical hacking skills. It is packed with practical recipes that will quickly get you started with Kali Linux (version 2018.4 / 2019), in addition to covering the core functionalities.

About the Author :

Himanshu Sharma has already achieved fame for finding security loopholes and vulnerabilities in Apple, Google, Microsoft, Facebook, Adobe, Uber, ATT, Avira, and many more with hall of fame listings. He has helped celebrities such as Harbhajan Singh in recovering their hacked accounts, and also assisted an international singer in recovering his hacked accounts. He was a speaker at the international conference Botconf ’13, CONFidence 2018 and RSA Singapore 2018. He also spoke at the IEEE Conference as well as for TedX. Currently, he is the co-founder of BugsBounty, a crowd-sourced security platform.

How to Install PowerDNS and Poweradmin on CentOS 7

PowerDNS (pdns) is an open source DNS server written in C++ and released under GPL License. It has become a good alternative for the traditional DNS server Bind, designed with better performance and low memory requirements. PowerDNS provides two products, the Authoritative server, and the Recursor. The PowerDNS Authoritative server can be configured through the different backend, including the plain Bind zone files, RDBMS such as MySQL, PostgreSQL, SQLite3 or LDAP.

In this tutorial, I will show you how to install and configure a PowerDNS Authoritative server with MariaDB database server as a Backend and using Poweradmin for easy DNS management.

Prerequisites

  • CentOS 7 server
  • Root privileges

What we will do:

  1. Install EPEL and Remi Repositories
  2. Install and Configure MariaDB
  3. Install PowerDNS
  4. Install Poweradmin
  5. Poweradmin Post-Installation
  6. Create Sample Zone

Step 1 – Install EPEL and Remi Repositories

First of all, we need to install dependencies for the PowerDNS installation. We’re going to install the EPEL repository and the REMI for PHP 7.2 installation.

Install EPEL and PHP Remi repository using the following commands.

yum -y install epel-release
 yum -y install http://rpms.remirepo.net/enterprise/remi-release-7.rpm

Once these repositories are added to the system, install the ‘yum-utils’ package.

yum -y install yum-utils

And enable the PHP 7.2 Remi repository using the following command.

yum-config-manager --enable remi-php72

Step 2 – Install and Configure MariaDB

The PowerDNS Authoritative server has support for a different backend, including the MySQL/MariaDB database server. The terms of ‘backend’ is a datastore that the server will consult that contains DNS records (and some meta-data). And for this guide, we will be using the MariaDB as a backend.

Install MariaDB using the following yum command.

yum -y install mariadb mariadb-server

Once the installation is complete, start the MariaDB service and add it to the startup boot time.

systemctl start mariadb
 systemctl enable mariadb

Next, we’re going to configure the root password for the MariaDB using the interactive tool called ‘mysql_secure_installation’.

Run the command below.

mysql_secure_installation

And you will be prompted for configuring the root password of the database server. Type ‘Y’ to set up the root password and type a strong password.

Set root password? [Y/n] Y
New password: 
Re-enter new password: 

For the others, just type ‘Y’ to yes.

Remove anonymous users? [Y/n] Y
Disallow root login remotely? [Y/n] Y
Remove test database and access to it? [Y/n] Y
Reload privilege tables now? [Y/n] Y

As a result, you’ve been installed the MariaDB database server and set up the root password for authentication.

Next, we will create a new database and user for the PowerDNS installation. Login to the MySQL shell with the user root and your password.

Run MySQL command below.

mysql -u root -p
 PASSWORD

Now create a new database called ‘powerdns’ and grant all the database privileges to a new user named ‘pdns’ with password ‘pdnspassword2018’.

create database powerdns;
 grant all privileges on powerdns.* to [email protected] identified by 'pdnspassword2018';
 flush privileges;

Install PowerDNS database

After that, create the tables structures for the PowerDNS database by running following MySQL queries below.

use powerdns;

CREATE TABLE domains (
id                    INT AUTO_INCREMENT,
name                  VARCHAR(255) NOT NULL,
master                VARCHAR(128) DEFAULT NULL,
last_check            INT DEFAULT NULL,
type                  VARCHAR(6) NOT NULL,
notified_serial       INT DEFAULT NULL,
account               VARCHAR(40) DEFAULT NULL,
PRIMARY KEY (id)
) Engine=InnoDB;

CREATE UNIQUE INDEX name_index ON domains(name);

CREATE TABLE records (
id                    BIGINT AUTO_INCREMENT,
domain_id             INT DEFAULT NULL,
name                  VARCHAR(255) DEFAULT NULL,
type                  VARCHAR(10) DEFAULT NULL,
content               VARCHAR(64000) DEFAULT NULL,
ttl                   INT DEFAULT NULL,
prio                  INT DEFAULT NULL,
change_date           INT DEFAULT NULL,
disabled              TINYINT(1) DEFAULT 0,
ordername             VARCHAR(255) BINARY DEFAULT NULL,
auth                  TINYINT(1) DEFAULT 1,
PRIMARY KEY (id)
) Engine=InnoDB;

CREATE INDEX nametype_index ON records(name,type);
CREATE INDEX domain_id ON records(domain_id);
CREATE INDEX recordorder ON records (domain_id, ordername);

CREATE TABLE supermasters (
ip                    VARCHAR(64) NOT NULL,
nameserver            VARCHAR(255) NOT NULL,
account               VARCHAR(40) NOT NULL,
PRIMARY KEY (ip, nameserver)
) Engine=InnoDB;

CREATE TABLE comments (
id                    INT AUTO_INCREMENT,
domain_id             INT NOT NULL,
name                  VARCHAR(255) NOT NULL,
type                  VARCHAR(10) NOT NULL,
modified_at           INT NOT NULL,
account               VARCHAR(40) NOT NULL,
comment               VARCHAR(64000) NOT NULL,
PRIMARY KEY (id)
) Engine=InnoDB;

CREATE INDEX comments_domain_id_idx ON comments (domain_id);
CREATE INDEX comments_name_type_idx ON comments (name, type);
CREATE INDEX comments_order_idx ON comments (domain_id, modified_at);

CREATE TABLE domainmetadata (
id                    INT AUTO_INCREMENT,
domain_id             INT NOT NULL,
kind                  VARCHAR(32),
content               TEXT,
PRIMARY KEY (id)
) Engine=InnoDB;

CREATE INDEX domainmetadata_idx ON domainmetadata (domain_id, kind);

CREATE TABLE cryptokeys (
id                    INT AUTO_INCREMENT,
domain_id             INT NOT NULL,
flags                 INT NOT NULL,
active                BOOL,
content               TEXT,
PRIMARY KEY(id)
) Engine=InnoDB;

CREATE INDEX domainidindex ON cryptokeys(domain_id);

CREATE TABLE tsigkeys (
id                    INT AUTO_INCREMENT,
name                  VARCHAR(255),
algorithm             VARCHAR(50),
secret                VARCHAR(255),
PRIMARY KEY (id)
) Engine=InnoDB;

CREATE UNIQUE INDEX namealgoindex ON tsigkeys(name, algorithm);

quit;

As a result, the MySQL/MariaDB database and a user for PowerDNS installation has been created.

Step 3 – Install PowerDNS

Install PowerDNS and all packages needed using the following command.

yum -y install pdns pdns-backend-mysql bind-utils

After installing PowerDNS packages, go to the ‘/etc/pdns/’ directory and edit the configuration file ‘pdns.conf’ using vim editor.

cd /etc/pdns/
 vim pdns.conf

By default, PowerDNS is using ‘bind’ as the backend. So, type comment ‘#’ in the front of ‘launch=bind’ configuration and paste the MySQL backend configuration as below.

#launch=bind

launch=gmysql
gmysql-host=localhost
gmysql-user=pdns
gmysql-password=pdnspassword2018
gmysql-dbname=powerdns

Save and close.

Install PowerDNS

Now start the pdns service and add it to the startup boot time.

systemctl start pdns
 systemctl enable pdns

After that, add the DNS service to the firewall.

firewall-cmd --add-service=dns --permanent
 firewall-cmd --reload

Configure the Firewall

And the PowerDNS service is up and running, check using the following command.

netstat -tap | grep pdns
 netstat -tulpn | grep 53
 dig @10.9.9.10

As a result, you will get the pdns service is up and running on port 53 and get the response from the PowerDNS server.

Check PowerDNS status

Step 4 – Install Poweradmin

In this step, we’re going to install the DNS management for PowerDNS called ‘Poweradmin’. It’s a web application based on PHP, so we need to install PHP and web server in order to run the application.

Install an httpd web server and PHP packages using the following command.

yum -y install httpd php php-devel php-gd php-imap php-ldap php-mysql php-odbc php-pear php-xml php-xmlrpc php-mbstring php-mcrypt php-mhash gettext

After the installation, we need to install additional PHP Pear packages. Run the following command.

yum -y install php-pear-DB php-pear-MDB2-Driver-mysqli

Once the httpd and PHP installation is complete, start the httpd service and add it to the startup boot time.

systemctl start httpd
 systemctl enable httpd

Next, go to the ‘/var/www/html’ directory and download the poweradmin source code.

cd /var/www/html/
 wget http://downloads.sourceforge.net/project/poweradmin/poweradmin-2.1.7.tgz

Extract the poweradmin compressed file and rename it.

tar xvf poweradmin-2.1.7.tgz
 mv poweradmin-2.1.7/ poweradmin/

After that, add the HTTP and HTTPS protocols to the firewall.

firewall-cmd --add-service={http,https} --permanent
 firewall-cmd --reload

And we’re ready for the poweradmin post-installation.

Step 5 – Poweradmin Post-Installation

Open your web browser and type the server IP address plus the /poweradmin/install/ path URL for the installation. Mine is:

http://10.9.9.10/poweradmin/install/

Choose your preferred language and click the ‘Go to Step 2’ button.

PowerAdmin setup 1

Now just click the ‘Go to Step 3’ button.

PowerAdmin setup 2

And you will be displayed for the database configuration. Type the PowerDNS database details that we’ve created and the admin password for PowerDNS.

PowerAdmin database setup

Click the ‘Go to Step 4’ button.

After that, you will need to create a new user will limited right privileges. Type the details as the following and change the user, password, etc with your own.

PowerAdmin user setup

Now click ‘Go to Step 5’ button.

And you will be shown the page as below.

PowerAdmin setup finished

Open again your terminal server, log in with the root user and password. Then run the MySQL queries as on the page.

mysql -u root -p
 PASSWORD

GRANT SELECT, INSERT, UPDATE, DELETE
ON powerdns.*
TO ‘hakase’@’localhost’
IDENTIFIED BY ‘hakase-labs123’;

Mysql commands

Now back to the web browser and click the ‘Go to Step 6’ button.

And you will be shown the page as below.

Installation step 6

The installer was unable to create a new configuration ‘../inc/config.inc.php’. So, we need to create it manually.

Back to the terminal server, go to the ‘/var/www/html/poweradmin’ directory and create a new configuration file ‘inc/config.inc.php’.

cd /var/www/html/poweradmin
 vim inc/config.inc.php

Now paste the PHP script on the page into it.

?php

$db_host                = 'localhost';
$db_user                = 'hakase';
$db_pass                = 'hakase-labs123';
$db_name                = 'powerdns';
$db_type                = 'mysql';
$db_layer               = 'PDO';

$session_key            = '[email protected]=uetwJeD2#uApgO)2Ekj+S#oN1Khhoj';

$iface_lang             = 'en_EN';

$dns_hostmaster         = 'server.hakase-labs.io';
$dns_ns1                = 'ns1.hakase-labs.io';
$dns_ns2                = 'ns2.hakase-labs.io';

Save and close, then back to the browser and click the button.

Database configuration file

And the installation is complete.

Optionally:

If you want to support for the URLs used by other Dynamic providers, copy the htaccess file.

cd /var/www/html/poweradmin
 cp install/htaccess.dist .htaccess

After that, you MUST remove the ‘install’ directory.

rm -rf /var/www/html/poweradmin/install

.htaccess protection

Back again to your web browser and log in to the Poweradmin dashboard using the URL as below.

http://10.9.9.10/poweradmin/

Log in with the default user ‘admin’ and the password, click the ‘Go’ button.

PowerAdmin Login

And as a result, you will be shown the Poweradmin dashboard and the installation is finished.

PowerAdmin Dashboard

Step 6 – Create Sample Zone and DNS Records

At this stage, we’re going test the PowerDNS and Poweradmin installation by creating a new DNS zone for a domain called ’emma.io’.

On the Poweradmin dashboard, click the ‘Add master zone’ menu.

Add master zone

Set the zone name with the domain name ’emaa.io’ and click ‘Add zone’ button.

Add DNS Zone in PowerAdmin

Click the ‘List zones’ menu to get all available zone. And click the ‘edit’ button for the zone ’emma.io’.

Set Zone name

Click the ‘List zones’ menu to get all available zone. And click the ‘edit’ button for the zone ’emma.io’.

List zones

Now click the ‘Add record’ button and we successfully add the DNS zone and DNS record for the domain named ’emma.io’.

Next, we’re going to test the domain ’emma.io’ using a ‘dig’ DNS utility command.

Check the name server or ns record of the domain ’emma.io’.

dig NS emma.io @10.9.9.10

Check zone with dig command

Check the A DNS record of the domain ’emma.io’.

dig A emma.io @10.9.9.10

dig command result

And you will be displayed the domain ’emma.io’ has a nameserver from our DNS server ‘ns1.hakase-labs.io’, and the ‘A’ of that domain name is match with our configuration on the top with server IP address ‘10.9.9.11’.

Finally, the installation and configuration of PowerDNS and Poweradmin on CentOS 7 have been completed successfully.

Reference

How to Install Bludit CMS with NGINX on CentOS 7

Bludit is a simple, fast, secure, flat-file CMS that allows you to create your own website or blog in seconds. It’s completely free and open source. You can browse its source code on Github. Bludit uses files in JSON format to store the content, you don’t need to install or configure a database. You only need a web server with PHP support. Bludit incorporates all the SEO tools to improve your ranking in all the search engines and social networks. It has a rich themes and plugins system that you can use to change the look and feel of your site. In this tutorial, we will go through the Bludit CMS installation and setup on CentOS 7 system by using NGINX as a web server.

Requirements

Make sure your system meets the following requirements:

  • PHP version 5.3 or greater with the following extensions: mbstring, gd, dom and JSON.
  • A web server with PHP support like Nginx, Apache, Lighttpd, H2O. This tutorial will use NGINX.

Prerequisites

  • A system running CentOS 7.
  • A non-root user with sudo privileges.

Initial steps

Check your CentOS version:

cat /etc/centos-release
# CentOS Linux release 7.6.1810 (Core)

Set up the timezone:

timedatectl list-timezones
sudo timedatectl set-timezone 'Region/City'

Update your operating system packages (software). This is an important first step because it ensures you have the latest updates and security fixes for your operating system’s default software packages:

sudo yum update -y

Install some essential packages that are necessary for basic administration of the CentOS operating system:

sudo yum install -y curl wget vim git unzip socat bash-completion epel-release

Step 1 – Install PHP

Setup the Webtatic YUM repo:

sudo rpm -Uvh https://mirror.webtatic.com/yum/el7/webtatic-release.rpm

Install PHP, as well as the necessary PHP extensions:

sudo yum install -y php72w php72w-cli php72w-fpm php72w-common php72w-mbstring php72w-zip php72w-pgsql php72w-sqlite3 php72w-curl php72w-gd php72w-mysql php72w-intl php72w-json php72w-opcache php72w-xml

To show PHP compiled in modules, you can run:

php -m

ctype
curl
exif
fileinfo
. . .
. . .

Check the PHP version:

php --version
# PHP 7.2.14 (cli) (built: Jan 12 2019 12:47:33) ( NTS )
# Copyright (c) 1997-2018 The PHP Group
# Zend Engine v3.0.0, Copyright (c) 1998-2017 Zend Technologies
#     with Zend OPcache v7.2.14, Copyright (c) 1999-2018, by Zend Technologies

Start and enable PHP-FPM service:

sudo systemctl start php-fpm.service
sudo systemctl enable php-fpm.service

Step 2 – Install acme.sh client and obtain Let’s Encrypt certificate (optional)

Securing your website with HTTPS is not necessary, but it is a good practice to secure your site traffic. In order to obtain a TLS certificate from Let’s Encrypt we will use Acme.sh client. Acme.sh is a pure Unix shell software for obtaining TLS certificates from Let’s Encrypt with zero dependencies.

Download and install Acme.sh:

sudo mkdir /etc/letsencrypt
git clone https://github.com/Neilpang/acme.sh.git
cd acme.sh 
sudo ./acme.sh --install --home /etc/letsencrypt --accountemail [email protected]
cd ~

Check Acme.sh version:

/etc/letsencrypt/acme.sh --version
# v2.8.0

Obtain RSA and ECC/ECDSA certificates for your domain/hostname:

# RSA 2048
sudo /etc/letsencrypt/acme.sh --issue --standalone --home /etc/letsencrypt -d example.com --keylength 2048
# ECDSA
sudo /etc/letsencrypt/acme.sh --issue --standalone --home /etc/letsencrypt -d example.com --keylength ec-256

After running the above commands, your certificates and keys will be in:

  • For RSA: /etc/letsencrypt/example.com directory.
  • For ECC/ECDSA: /etc/letsencrypt/example.com_ecc directory.

Step 3 – Install and configure NGINX

Download and install Nginx from the CentOS repository:

sudo yum install -y nginx

Check the Nginx version:

nginx -v
# nginx version: nginx/1.12.2

Start and enable Nginx service:

sudo systemctl start nginx.service
sudo systemctl enable nginx.service

Configure NGINX for Bludit by running:

sudo vim /etc/nginx/conf.d/bludit.conf

And populate the file with the following configuration:

server {
  listen 80;
  listen 443 ssl;

ssl_certificate /etc/letsencrypt/example.com/fullchain.pem;
ssl_certificate_key /etc/letsencrypt/example.com/private.key;
ssl_certificate /etc/letsencrypt/example.com_ecc/fullchain.pem;
ssl_certificate_key /etc/letsencrypt/example.com_ecc/private.key;
server_name example.com; root /var/www/bludit; index index.php; location ~ .php$ { fastcgi_pass 127.0.0.1:9000; fastcgi_index index.php; include fastcgi.conf; } location / { try_files $uri $uri/ /index.php?$args; } location ^~ /bl-content/tmp/ { deny all; } location ^~ /bl-content/pages/ { deny all; } location ^~ /bl-content/databases/ { deny all; } }

Check NGINX configuration for syntax errors:

sudo nginx -t

Reload NGINX service:

sudo systemctl reload nginx.service

Step 4 – Install Bludit

Create a document root directory where Bludit should reside in:

sudo mkdir -p /var/www/bludit

Change ownership of the /var/www/bludit directory to [your_user]:

sudo chown -R [your_user]:[your_user] /var/www/bludit

Navigate to document root:

cd /var/www/bludit

Download the latest version from the official page and extract the zip file:

wget https://www.bludit.com/releases/bludit-3-8-1.zip
unzip bludit-3-8-1.zip
rm bludit-3-8-1.zip
mv bludit-3-8-1/* .  mv bludit-3-8-1/.* .
rmdir bludit-3-8-1

NOTE: Update download URL if there is a newer release.

Provide the appropriate ownership:

sudo chown -R nginx:nginx /var/www/bludit

Run sudo vim /etc/php-fpm.d/www.conf and set the user and group to nginx. Initially, they will be set to apache:

sudo vim /etc/php-fpm.d/www.conf
# user = nginx
# group = nginx

Restart PHP-FPM service:

sudo systemctl restart php-fpm.service

Step 5 – Complete the Bludit installation wizard

Open your site in a web browser. After opening your site in a web browser, you should be redirected to the following page, to choose your language:

Bludit Installer

Next, create a password for the user admin, and click “Install”:

Set Admin password

After creating an admin password, you will be redirected to the Bludit frontend:

Welcome to Bludit

To access Bludit admin area, append /admin to your site IP or URL. This is how Bludit admin looks like:

Bludit CMS Dashboard

Installation is complete. Happy blogging with Bludit CMS.

Data Recovery Techniques on Linux

Data Recovery Techniques on Linux

When one of my friends called telling me that he had accidentally deleted some important files from his drive, his exasperation was understandable. It happens to everyone at some point of their computer-using lives. Unfortunately, in his case, those were some extremely important documents that, had he not recovered them, could have proven very costly.

Fortunately, I managed to guide him through the process of recovery, and now, I’m going to guide you too.

What happens when a file is deleted?

Data stored in files has a table of contents which indicates the storage location for each file on the drive. When we remove or delete a file the file goes into the trash. Files removed using rm command can be easily recovered.

Removal/Deletion of a file leads to the removal of only of the table of contents. This states that now the space from which the file is removed is ready for new data to be stored; so while in the case of new data having been written over that space the recovery of the old data becomes difficult. But, if there is no new data written there, we can still recover it.

First, let’s go through a few Dos and Don’ts .

DO’s and Don’ts when a file is lost

Don’ts:

  • Do not write any data on the device.
  • Do not mount or use any random recovery software
  • Do not use any software to recover the data if you don’t have a complete understanding of it.

Do’s:

  • Shutdown the system immediately.
  • Reboot the system with a CD or with a live version of Linux running on a thumb device.
  • Do use the below mentioned tools.

There are various tools which can be used for data-recovery.

Here are some trusted tools that can be used:

  • Extundelete
  • PhotoRec

Extundelete Utility:

The extundelete utility is used for the recovery of an ext3 and ext4 linux partition. The utility uses the information stored in the partition journal to recover the data.

Recovering the File :

Prerequisites : Install the binary and development packages for e2fsprogs and e2fslibs.

Download the latest version of extundelete.

Copy the package to the /opt .

tar –zxjf extundelete-version.tar.bz2
cd extundelete-version
./configure
make install

  • Steps how to use extundelete to recover a file :
  1. We need to recover a file /home/jack/important/file1.
  2. The output of the mount command shows the below output.

/dev/sda4 on /home type ext3 (rw)

  1. Now use the command as below

umount /dev/sda4

  1. Now run the below extundelete command as follows.

extundelete /dev/sda4 –restore-file jack/important/file1

PhotoRec Sotware :-

This software is used to restore files with extensions such as ZIP, Office, PDF, HTML, JPEG and 390 other file extensions. Photorec completely ignores the partition but it does focus on the underlying data. This states that it does work even if the device has been damaged . It works only with read only access.

While using photorec you may restore the data at the following locations.

  • Recovering files to a separate hard-drive.
  • Recovering data to a network drive
  • Recovering data to a separate partition on the same hard drive.

Installation of the PhotoRec Software:

  1. Download the software from the mentioned link http://www.cgsecurity.org/wiki/TestDisk_Download
  2. Unpack the software to the directory where it has copied to .
  3. Untar the software.
  4. Use the below command to install the software

sudo ./photorec_static

This will help you launch PhotoRec and retrieve the data then.

In the end, there are many data recovery tools. Various other companies have developed tools to recover the data. But you should use them only if have a good knowledge of how they work and the process of using them.

If you are novice please do your research, or consider getting some professional help (such as in the case of my friend) so that you may not lead into any other disasters with your system. Data recovery can be dangerous, and as with anything, prevention is the best cure ? so back-up!

How to Install Grav CMS on CentOS 7

Grav is a fast, simple, and flexible, file-based CMS platform. Grav comes with a powerful Package Management System to allow for simple installation and upgrading of plugins and themes, as well as simple updating of Grav itself.

The underlying architecture of Grav is designed to use well-established and best-in-class technologies to ensure that Grav is simple to use and easy to extend. Some of these key technologies include:

  • Twig Templating: for powerful control of the user interface
  • Markdown: for easy content creation
  • YAML: for simple configuration
  • Parsedown: for fast Markdown and Markdown Extra support
  • Doctrine Cache: layer for performance
  • Pimple Dependency Injection Container: for extensibility and maintainability
  • Symfony Event Dispatcher: for plugin event handling
  • Symfony Console: for CLI interface
  • Gregwar Image Library: for dynamic image manipulation

Requirements

Grav is intentionally designed with few requirements. Grav is built with plain text files for your content. There is no database needed.

Make sure your system meets the following requirements:

  • Web Server (Apache, Nginx, LiteSpeed, Lightly, IIS, etc.) We will use NGINX.
  • PHP version 7.1.3 or higher

Prerequisites

  • An operating system running CentOS 7.
  • A non-root user with sudo privileges.

Initial steps

Check your CentOS version:

cat /etc/centos-release
# CentOS Linux release 7.6.1810 (Core)

Set up the timezone:

timedatectl list-timezones
sudo timedatectl set-timezone 'Region/City'

Update your operating system packages (software). This is an important first step because it ensures you have the latest updates and security fixes for your operating system’s default software packages:

sudo yum update -y

Install some essential packages that are necessary for basic administration of the CentOS operating system:

sudo yum install -y curl wget vim git unzip socat bash-completion epel-release

Step 1 – Install PHP and necessary PHP extensions

Setup the Webtatic YUM repo:

sudo rpm -Uvh https://mirror.webtatic.com/yum/el7/webtatic-release.rpm

Install PHP, as well as the necessary PHP extensions:

sudo yum install -y php72w php72w-cli php72w-fpm php72w-common php72w-curl php72w-gd php72w-json php72w-mbstring php72w-xml php72w-zip php72w-opcache php72w-pecl-apcu

To show PHP compiled in modules, you can run:

php -m

ctype
curl
exif
fileinfo
. . .
. . .

Check the PHP version:

php --version

# PHP 7.2.17 (cli) (built: May 13 2019 18:03:04) ( NTS )
# Copyright (c) 1997-2018 The PHP Group
# Zend Engine v3.2.0, Copyright (c) 1998-2018 Zend Technologies
# with Zend OPcache v7.2.17, Copyright (c) 1999-2018, by Zend Technologies

Start and enable PHP-FPM service:

sudo systemctl start php-fpm.service
sudo systemctl enable php-fpm.service

Step 2 – Install acme.sh client and obtain Let’s Encrypt certificate ( optional )

Securing your forum with HTTPS is not necessary, but it is a good practice to secure your site traffic. In order to obtain TLS certificate from Let’s Encrypt we will use acme.sh client. Acme.sh is a pure UNIX shell software for obtaining TLS certificates from Let’s Encrypt with zero dependencies.

Download and install acme.sh:

sudo su - root
git clone https://github.com/Neilpang/acme.sh.git
cd acme.sh 
./acme.sh --install --accountemail [email protected]
source ~/.bashrc
cd ~

Check acme.sh version:

acme.sh --version
# v2.8.0

Obtain RSA and ECC/ECDSA certificates for your domain/hostname:

# RSA 2048
acme.sh --issue --standalone -d example.com --keylength 2048
# ECDSA
acme.sh --issue --standalone -d example.com --keylength ec-256

If you want fake certificates for testing you can add --staging flag to the above commands.

After running the above commands, your certificates and keys will be in:

  • For RSA/home/username/example.com directory.
  • For ECC/ECDSA/home/username/example.com_ecc directory.

To list your issued certs you can run:

acme.sh --list

Create a directory to store your certs. We will use /etc/letsencrypt directory.

mkdir -p /etc/letsecnrypt/example.com
sudo mkdir -p /etc/letsencrypt/example.com_ecc

Install/copy certificates to /etc/letsencrypt directory.

# RSA
acme.sh --install-cert -d example.com --cert-file /etc/letsencrypt/example.com/cert.pem --key-file /etc/letsencrypt/example.com/private.key --fullchain-file /etc/letsencrypt/example.com/fullchain.pem --reloadcmd "sudo systemctl reload nginx.service"
# ECC/ECDSA
acme.sh --install-cert -d example.com --ecc --cert-file /etc/letsencrypt/example.com_ecc/cert.pem --key-file /etc/letsencrypt/example.com_ecc/private.key --fullchain-file /etc/letsencrypt/example.com_ecc/fullchain.pem --reloadcmd "sudo systemctl reload nginx.service"

All the certificates will be automatically renewed every 60 days.

After obtaining certs exit from root user and return back to normal sudo user:

exit

Step 3 – Install and configure NGINX

Install NGINX:

sudo yum install -y nginx

Check the NGINX version:

nginx -v
# nginx version: nginx/1.12.2

Start and enable NGINX service:

sudo systemctl start nginx.service
sudo systemctl enable nginx.service

Configure NGINX for Grav. Run sudo vim /etc/nginx/conf.d/grav.conf and add the following configuration.

server {
  
  listen 80;
  listen 443 ssl;
  server_name example.com;
  root /var/www/grav;
  ssl_certificate /etc/letsencrypt/example.com/fullchain.pem;
  ssl_certificate_key /etc/letsencrypt/example.com/private.key;
  ssl_certificate /etc/letsencrypt/example.com_ecc/fullchain.pem;
  ssl_certificate_key /etc/letsencrypt/example.com_ecc/private.key;
  index index.html index.php;
  
  location / {
    try_files $uri $uri/ /index.php?$query_string;
  }
  
  location ~* /(.git|cache|bin|logs|backup|tests)/.*$ { return 403; }
  location ~* /(system|vendor)/.*.(txt|xml|md|html|yaml|yml|php|pl|py|cgi|twig|sh|bat)$ { return 403; }
  location ~* /user/.*.(txt|md|yaml|yml|php|pl|py|cgi|twig|sh|bat)$ { return 403; }
  location ~ /(LICENSE.txt|composer.lock|composer.json|nginx.conf|web.config|htaccess.txt|.htaccess) { return 403; }

  location ~ .php$ {
    fastcgi_pass 127.0.0.1:9000;
    fastcgi_split_path_info ^(.+.php)(/.+)$;
    fastcgi_index index.php;
    include fastcgi_params;
    fastcgi_param SCRIPT_FILENAME $document_root/$fastcgi_script_name;
  }

}

Check NGINX configuration for syntax errors:

sudo nginx -t

Reload NGINX service:

sudo systemctl reload nginx.service

Step 4 – Install Grav CMS

Create a document root directory:

sudo mkdir -p /var/www/grav

Change ownership of the /var/www/grav directory to johndoe:

sudo chown -R johndoe:johndoe /var/www/grav

Navigate to the document root folder:

cd /var/www/grav

Download and unzip Grav:

wget https://getgrav.org/download/core/grav-admin/1.6.9
unzip 1.6.9
mv grav-admin/* .  mv grav-admin/.* .
rm -rf grav-admin 1.6.9

NOTE: Version 1.6.9 is the current version and may be different by the time you read this. Please check the Grav website for the latest information.

Change ownership of the /var/www/grav directory to nginx:

sudo chown -R nginx:nginx /var/www/grav

Run sudo vim /etc/php-fpm.d/www.conf and set user and group to nginx. Initially, it will be set to user and group apache:

sudo vim /etc/php-fpm.d/www.conf
# user = nginx
# group = nginx

Restart the PHP-FPM service.

sudo systemctl restart php-fpm.service

Create /var/lib/php/session/ directory and change ownership to nginx:

sudo mkdir -p /var/lib/php/session/  sudo chown -R nginx:nginx /var/lib/php/session/

Open http://example.com in your web browser and follow the on-screen instructions. To access Grav admin append /admin to your URL.

Step 5 – Complete Grav setup

Links

How to install OTRS (OpenSource Trouble Ticket System) on CentOS 7

Rollbar: Users finding bugs? Searching logs for errors? Find + fix broken code fast!

OTRS (open-source trouble ticket system software) is a sophisticated open source software used by companies to improve their operation related to customer support, help desk, call centers and more. OTRS is written in PERL and provides the following important features:

  • Customers can register and create/interact with a Ticket via the customer portal and by email, phone, and fax with each queue (Attendants/Technicians post box).
  • Tickets can be managed by their priority, assignment, transmission and follow-up. A ticket can be split, merged, bulk actions can be applied, and links to each other and notifications can be set. Services can be configurated through the service catalog.
  • To increase the team capacity, auto email (automatic answers), text templates and signatures can be configured. The system supports notes and attachments on tickets.
  • Others capabilities include: statistics and reports (CSV/PDF), SLA and many other features.


The Environment

This article covers the OTRS 5 installation and basic configuration. This article was writen based on the following enviroment: A Virtual Box VM with CENTOS 7 Minimal, 2GB RAM, 8GB HD and 2 network interfaces (host only and NAT).


Preparation

Assuming that you use a fresh installation of Centos 7 Minimal,  before to install OTRS, run the following command to update the system and install aditional packages:

yum update

Transaction Summary ================================================================================ Install 1 Package Upgrade 39 Packages Total download size: 91 M Is this ok [y/d/N]: y

Install a text editor or use VI. In this article we use VIM, run the following command to install it:

yum install vim

To install the WGET package, run the following command:

yum install wget

To configure the Centos 7 network, run the following command to open the NMTUI (Network Manager Text User Interface) tool and edit the interfaces and hostname if nescessary:

nmtui

After setup of network settings and hostname on CentOS 7, run the following command to apply the changes:

service networks restart

To verify the network information, run the following command:

ip addr

The output looks like this on my system:

1: lo: LOOPBACK,UP,LOWER_UP mtu 65536 qdisc noqueue state UNKNOWN qlen 1
    link/loopback 00:00:00:00:00:00 brd 00:00:00:00:00:00
    inet 127.0.0.1/8 scope host lo
       valid_lft forever preferred_lft forever
    inet6 ::1/128 scope host 
       valid_lft forever preferred_lft forever
2: enp0s3: BROADCAST,MULTICAST,UP,LOWER_UP mtu 1500 qdisc pfifo_fast state UP qlen 1000
    link/ether 08:00:27:67:bc:73 brd ff:ff:ff:ff:ff:ff
    inet 10.0.2.15/24 brd 10.0.2.255 scope global dynamic enp0s3
       valid_lft 84631sec preferred_lft 84631sec
    inet6 fe80::9e25:c982:1091:90eb/64 scope link 
       valid_lft forever preferred_lft forever
3: enp0s8: BROADCAST,MULTICAST,UP,LOWER_UP mtu 1500 qdisc pfifo_fast state UP qlen 1000
    link/ether 08:00:27:68:88:f3 brd ff:ff:ff:ff:ff:ff
    inet 192.168.56.101/24 brd 192.168.56.255 scope global dynamic enp0s8
       valid_lft 1044sec preferred_lft 1044sec
    inet6 fe80::a00:27ff:fe68:88f3/64 scope link 
       valid_lft forever preferred_lft forever

Disable SELINUX (Security Enhanced Linux) on Centos 7, edit the following config file:

vim /etc/selinux/config

"/etc/selinux/config" 14L, 547C# This file controls the state of SELinux on the system.
# SELINUX= can take one of these three values:
#     enforcing - SELinux security policy is enforced.
#     permissive - SELinux prints warnings instead of enforcing.
#     disabled - No SELinux policy is loaded.
SELINUX=enforcing
# SELINUXTYPE= can take one of three two values:
#     targeted - Targeted processes are protected,
#     minimum - Modification of targeted policy. Only selected processes are prootected. 
#     mls - Multi Level Security protection.
SELINUXTYPE=targeted  

Change the value enforcing of directive SELINUX to disabled, save the file and reboot the server.

To check the status of SELinux on Centos 7, run the following command:

getenforce

The output must be:

Disabled


Install MariaDB on Centos 7

To install MariaDB on Centos 7, run the following command:

yum -y install mariadb-server

Create the file with the name zotrs.cnf in the following directory:

/etc/my.cnf.d/

To create and edit the file, run the following command:

vim /etc/my.cnf.d/zotrs.cnf

Fill the file with the following content and save it:

max_allowed_packet = 20M
query_cache_size = 32M
innodb_log_file_size = 256M

To start MariaDB, run the following command:

systemctl start mariadb

To increase the security of MariaDB, run the following command:

/usr/bin/mysql_secure_installation

Setup the options accordind the following output:

NOTE: RUNNING ALL PARTS OF THIS SCRIPT IS RECOMMENDED FOR ALL MariaDB
      SERVERS IN PRODUCTION USE!  PLEASE READ EACH STEP CAREFULLY!

In order to log into MariaDB to secure it, we'll need the current
password for the root user.  If you've just installed MariaDB, and
you haven't set the root password yet, the password will be blank,
so you should just press enter here.

Enter current password for root (enter for none):Press Enter
OK, successfully used password, moving on...

Setting the root password ensures that nobody can log into the MariaDB
root user without the proper authorisation.

Set root password? [Y/n] Press Y

Set the root password:

New password: 
Re-enter new password: 
Password updated successfully!
Reloading privilege tables..
 ... Success!

By default, a MariaDB installation has an anonymous user, allowing anyone
to log into MariaDB without having to have a user account created for
them.  This is intended only for testing, and to make the installation
go a bit smoother.  You should remove them before moving into a
production environment.

Remove anonymous users? [Y/n] Press Y
 ... Success!

Normally, root should only be allowed to connect from 'localhost'.  This
ensures that someone cannot guess at the root password from the network.

Disallow root login remotely? [Y/n] Choose acording your needs
 ... Success!

By default, MariaDB comes with a database named 'test' that anyone can
access.  This is also intended only for testing, and should be removed
before moving into a production environment.

Remove test database and access to it? [Y/n] Press Y
 - Dropping test database...
 ... Success!
 - Removing privileges on test database...
 ... Success!

Reloading the privilege tables will ensure that all changes made so far
will take effect immediately.

Reload privilege tables now? [Y/n] Press Y
 ... Success!

Cleaning up...

All done!  If you've completed all of the above steps, your MariaDB
installation should now be secure.

Thanks for using MariaDB!

Setup MariaDB to start up automatically at boot time:

systemctl enable mariadb.service

To download OTRS, run the following command:

wget http://ftp.otrs.org/pub/otrs/RPMS/rhel/7/otrs-5.0.15-01.n oarch.rpm


Install EPEL

Before we install OTRS, setup the EPEL repositoy on Centos 7. Run the following command to do so:

[root@centos7 ~]# yum -y http://mirror.globo.com/epel/7/x86_64/e/epel-r release-7-9.noarch.rpm


Install OTRS

Install OTRS with the following command:

yum install -nogpgcheck otrs-5.0.15-01.noarch.rpm

A list of software package will be installed, eg. Apache and all dependencies will be resolved automatically, at to the end of output press Y:

Transaction Summary
================================================================================
Install  1 Package (+143 Dependent packages)

Total size: 148 M
Total download size: 23 M
Installed size: 181 M
Is this ok [y/d/N]: y 

To start Apache (httpd), run the following command:

systemctl start httpd.service

To enable Apache (httpd) startup with systemd on Centos7, run the following command:

systemctl enable httpd.service

Enable SSL in Apache and configure a SelfSigned Certificate. Install the Mod_SSL module for the Apache HTTP Server, run the following command:

yum -y install mod_ssl

To generate a self-signed SSL certificate, go to the following directory:

cd /etc/pki/tls/certs/

And run the following command to generate the key (centos7.key is the name of my certificate, feel free to change it):

make centos7.key

umask 77 ; /usr/bin/openssl genrsa -aes128 2048 centos7.key Generating RSA private key, 2048 bit long modulus .+++ ……………………………………………………………………………..+++ e is 65537 (0x10001) Enter pass phrase: Insert your Own Password

Verifying – Enter pass phrase:Retype the Password

To generate the server SSL private key with OpenSSL, run the following command:

openssl rsa -in centos7.key -out centos7.key

Enter pass phrase for centos7.key: Type the Password writing RSA key

Run the following command to create the CSR (Certificate Signing Request) file (centos7.csr is the name of my certificate, feel free to change it):

make centos7.csr

Fill the questions acording your needs:

umask 77 ; /usr/bin/openssl req -utf8 -new -key centos7.key -out centos7.csr You are about to be asked to enter information that will be incorporated into your certificate request. What you are about to enter is what is called a Distinguished Name or a DN. There are quite a few fields but you can leave some blank For some fields there will be a default value, If you enter ‘.’, the field will be left blank. —–

Country Name (2 letter code) [XX]:

State or Province Name (full name) []:

Locality Name (eg, city) [Default City]:

Organization Name (eg, company) [Default Company Ltd]:

Organizational Unit Name (eg, section) []:

Centos7 Common Name (eg, your name or your server’s hostname) []:

Email Address []:

Please enter the following ‘extra’ attributes to be sent with your certificate request A challenge password []: press enter

An optional company name []:

Generate a CSR (Certificate Signing Request) for the server with the OpenSSL tool:

openssl x509 -in centos7.csr -out centos7.crt -req -signkey centos7.key

The output is:

Signature ok subject=/C=BR/ST=SP/L=Campinas/O=Centos7/OU=Centos7/CN=centos7.local Getting Private key

Before we edit the ssl.conf file, make a copy of the file with the following command:

cp /etc/httpd/conf.d/ssl.conf /etc/httpd/conf.d/ssl.conf.old

Then edit the file:

vim /etc/httpd/conf.d/ssl.conf

Find the following directives, uncomment each one and edit them like this:

SSLCertificateKeyFile /etc/pki/tls/certs/centos7.key

SSLCertificateFile /etc/pki/tls/certs/centos7.csr

SSLProtocol -All +TLSv1 +TLSv1.1 +TLSv1.2

ServerName centos7.local:443

Restart Apache with the following command:

systemctl restart httpd

To force OTRS to run in https mode, edit the following file:

vim /etc/httpd/conf/httpd.conf

At the end of file, uncoment the following directive:

IncludeOptional conf.d/*.conf

Edit the file zzz_otrs.conf:

vim /etc/httpd/conf.d/zzz_otrs.conf

After the line 26 (before the line module  mod_version.c) add the following directives:

RewriteEngine On
RewriteCond %{HTTPS} off
RewriteRule (.*) https://%{HTTP_HOST}%{REQUEST_URI}

Restart Apache:

[root@centos7 ~]# systemctl restart httpd

To use extended features in OTRS, we have to install some PERL modules. Run the following command to install them:

yum -y install “perl(Text::CSV_XS)” “perl(Crypt::Eksblowfish::Bcrypt)” “perl(YAML::XS)” “perl(JSON::XS)” “perl(Encode::HanExtra)” “perl(Mail::IMAPClient)” “perl(ModPerl::Util)”

The OTRS system has a tool to check the PERL modules, run it like this to verify the system requirements:

cd /opt/otrs/bin

and run:

./otrs.CheckModules.pl

The output for our configuration must be:

o Apache::DBI………………….ok (v1.12) o Apache2::Reload………………ok (v0.13) o Archive::Tar…………………ok (v1.92) o Archive::Zip…………………ok (v1.30) o Crypt::Eksblowfish::Bcrypt…….ok (v0.009) o Crypt::SSLeay………………..ok (v0.64) o Date::Format…………………ok (v2.24) o DBI…………………………ok (v1.627) o DBD::mysql…………………..ok (v4.023) o DBD::ODBC……………………Not installed! (optional – Required to connect to a MS-SQL database.) o DBD::Oracle………………….Not installed! (optional – Required to connect to a Oracle database.) o DBD::Pg……………………..Not installed! Use: ‘yum install “perl(DBD::Pg)”‘ (optional – Required to connect to a PostgreSQL database.) o Digest::SHA………………….ok (v5.85) o Encode::HanExtra……………..ok (v0.23) o IO::Socket::SSL………………ok (v1.94) o JSON::XS…………………….ok (v3.01) o List::Util::XS……………….ok (v1.27) o LWP::UserAgent……………….ok (v6.13) o Mail::IMAPClient……………..ok (v3.37) o IO::Socket::SSL…………….ok (v1.94) o ModPerl::Util………………..ok (v2.000010) o Net::DNS…………………….ok (v0.72) o Net::LDAP……………………ok (v0.56) o Template…………………….ok (v2.24) o Template::Stash::XS…………..ok (undef) o Text::CSV_XS…………………ok (v1.00) o Time::HiRes………………….ok (v1.9725) o Time::Piece………………….ok (v1.20_01) o XML::LibXML………………….ok (v2.0018) o XML::LibXSLT…………………ok (v1.80) o XML::Parser………………….ok (v2.41) o YAML::XS…………………….ok (v0.54)

To start the OTRS Daemon with the “otrs” user, run the following command:

su -c “/opt/otrs/bin/otrs.Daemon.pl start” -s /bin/bash otrs

To disable the CentOS 7 firewall, run the following command:

systemctl stop firewalld

To disable CentOS 7 Firewall to start up automaticaly, run:

systemctl disable firewalld.service

Start the OTRS Daemon with:

su -c “/opt/otrs/bin/otrs.Daemon.pl start” -s /bin/bash otrsCron.sh

The output of command must be:

/opt/otrs/bin Cron.sh – start/stop OTRS cronjobs Copyright (C) 2001-2012 OTRS AG, http://otrs.org/ (using /opt/otrs) done

If you want to check the OTRS Daemon status, run the following command:

su -c “/opt/otrs/bin/otrs.Daemon.pl status” -s /bin/bash otrsCron.sh

Configuring OTRS in the crontab. Change the user root to otrs and start to edit the crontab:

su otrs

crontab -e

Fill the crontab with the following content and save it:

# --
# Copyright (C) 2001-2016 OTRS AG, http://otrs.com/
# --
# This software comes with ABSOLUTELY NO WARRANTY. For details, see
# the enclosed file COPYING for license information (AGPL). If you
# did not receive this file, see http://www.gnu.org/licenses/agpl.txt.
# --

# Who gets the cron emails?
MAILTO="root@localhost"
# --
# Copyright (C) 2001-2016 OTRS AG, http://otrs.com/
# --
# This software comes with ABSOLUTELY NO WARRANTY. For details, see
# the enclosed file COPYING for license information (AGPL). If you
# did not receive this file, see http://www.gnu.org/licenses/agpl.txt.
# --

# check OTRS daemon status
*/5 * * * *    $HOME/bin/otrs.Daemon.pl start  /dev/null


Configure OTRS on CentOS 7

Open a web browser and open the URL https://centos7.local/otrs/installer.pl. Remember, centos7.local is the name of my server, insert your hostname or IP address. The first screen shows the 4 steps to conclude the OTRS installation, press Next.

OTRS installation screen

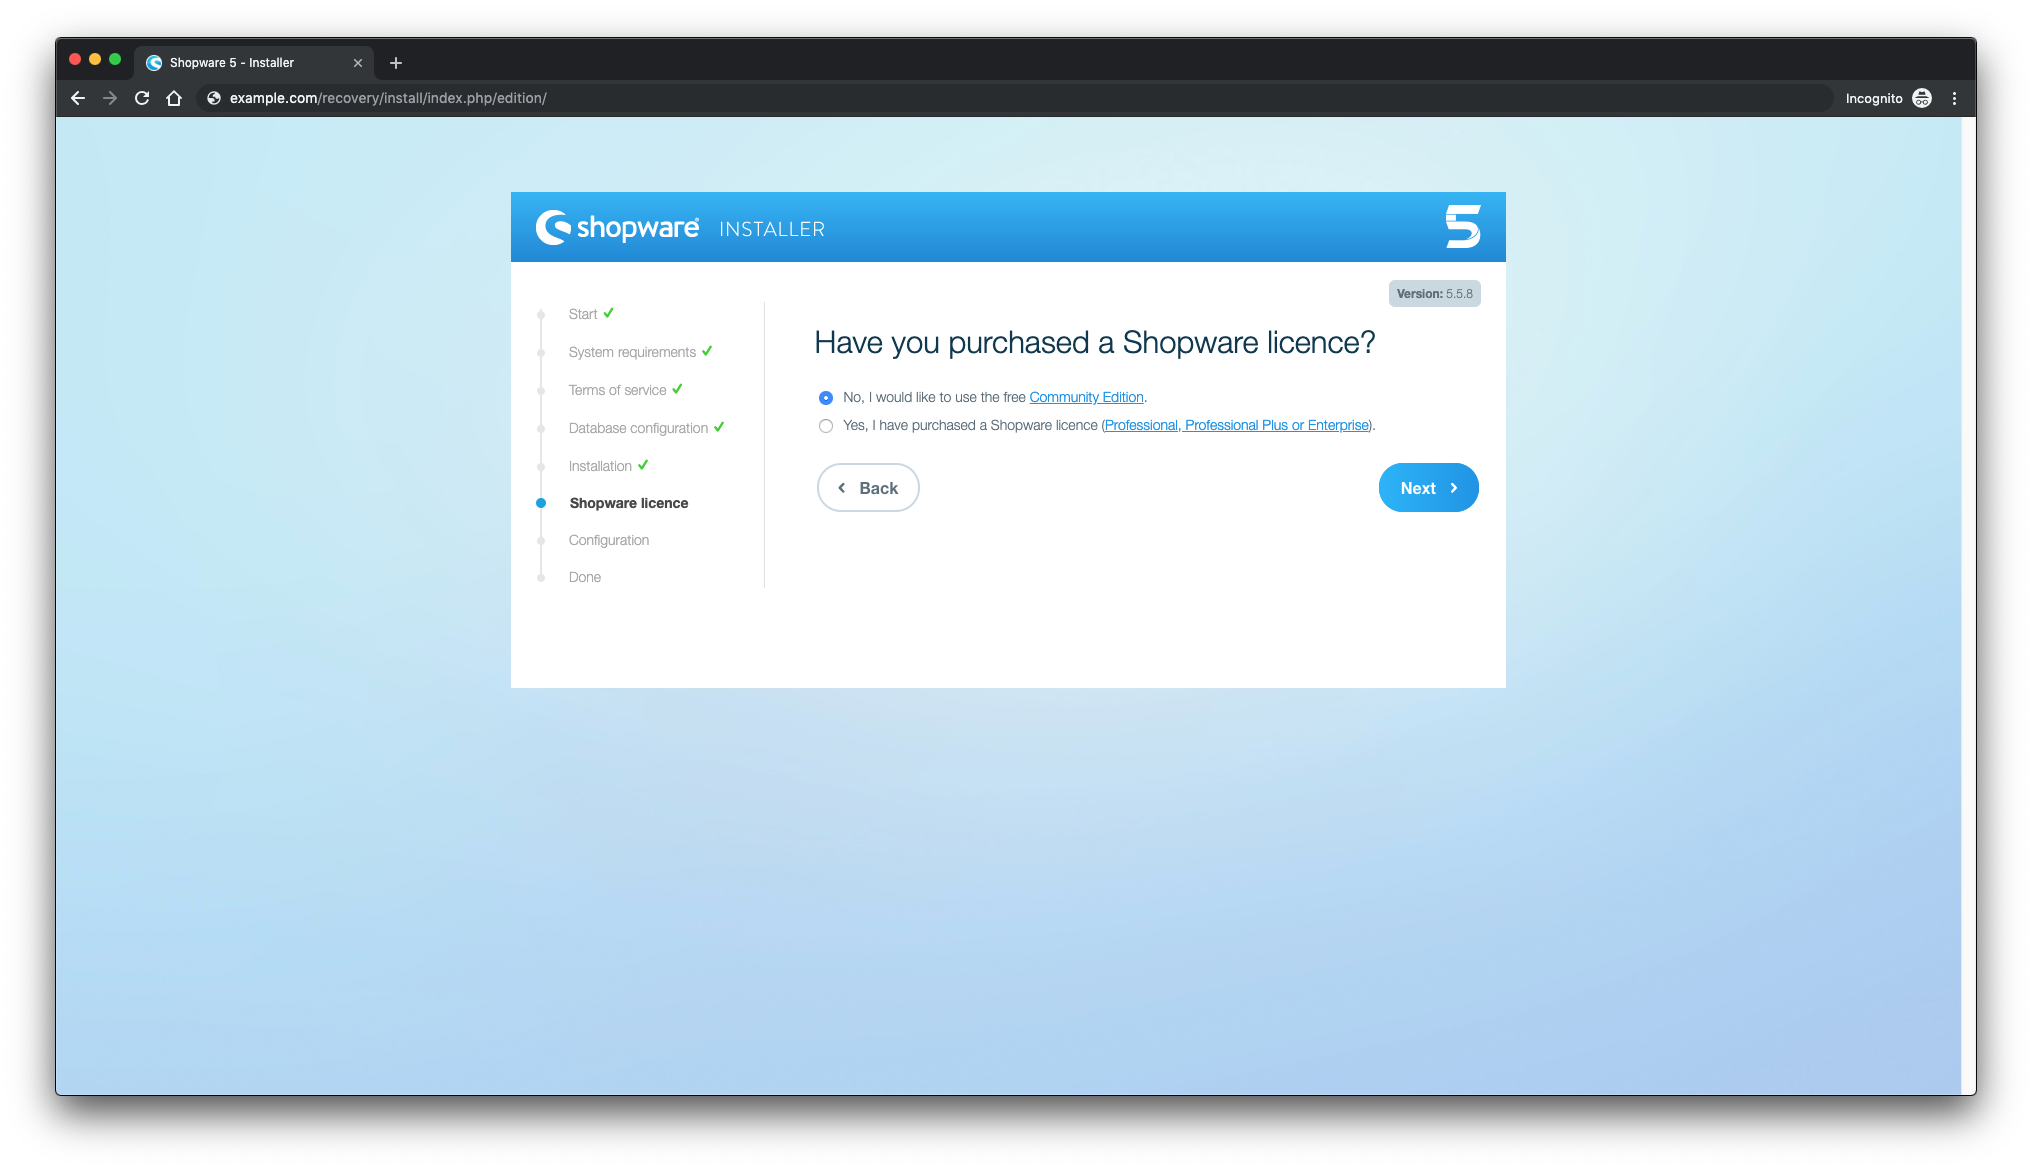
License: to continue, read and accept the license to continue:

Accept the license and continue

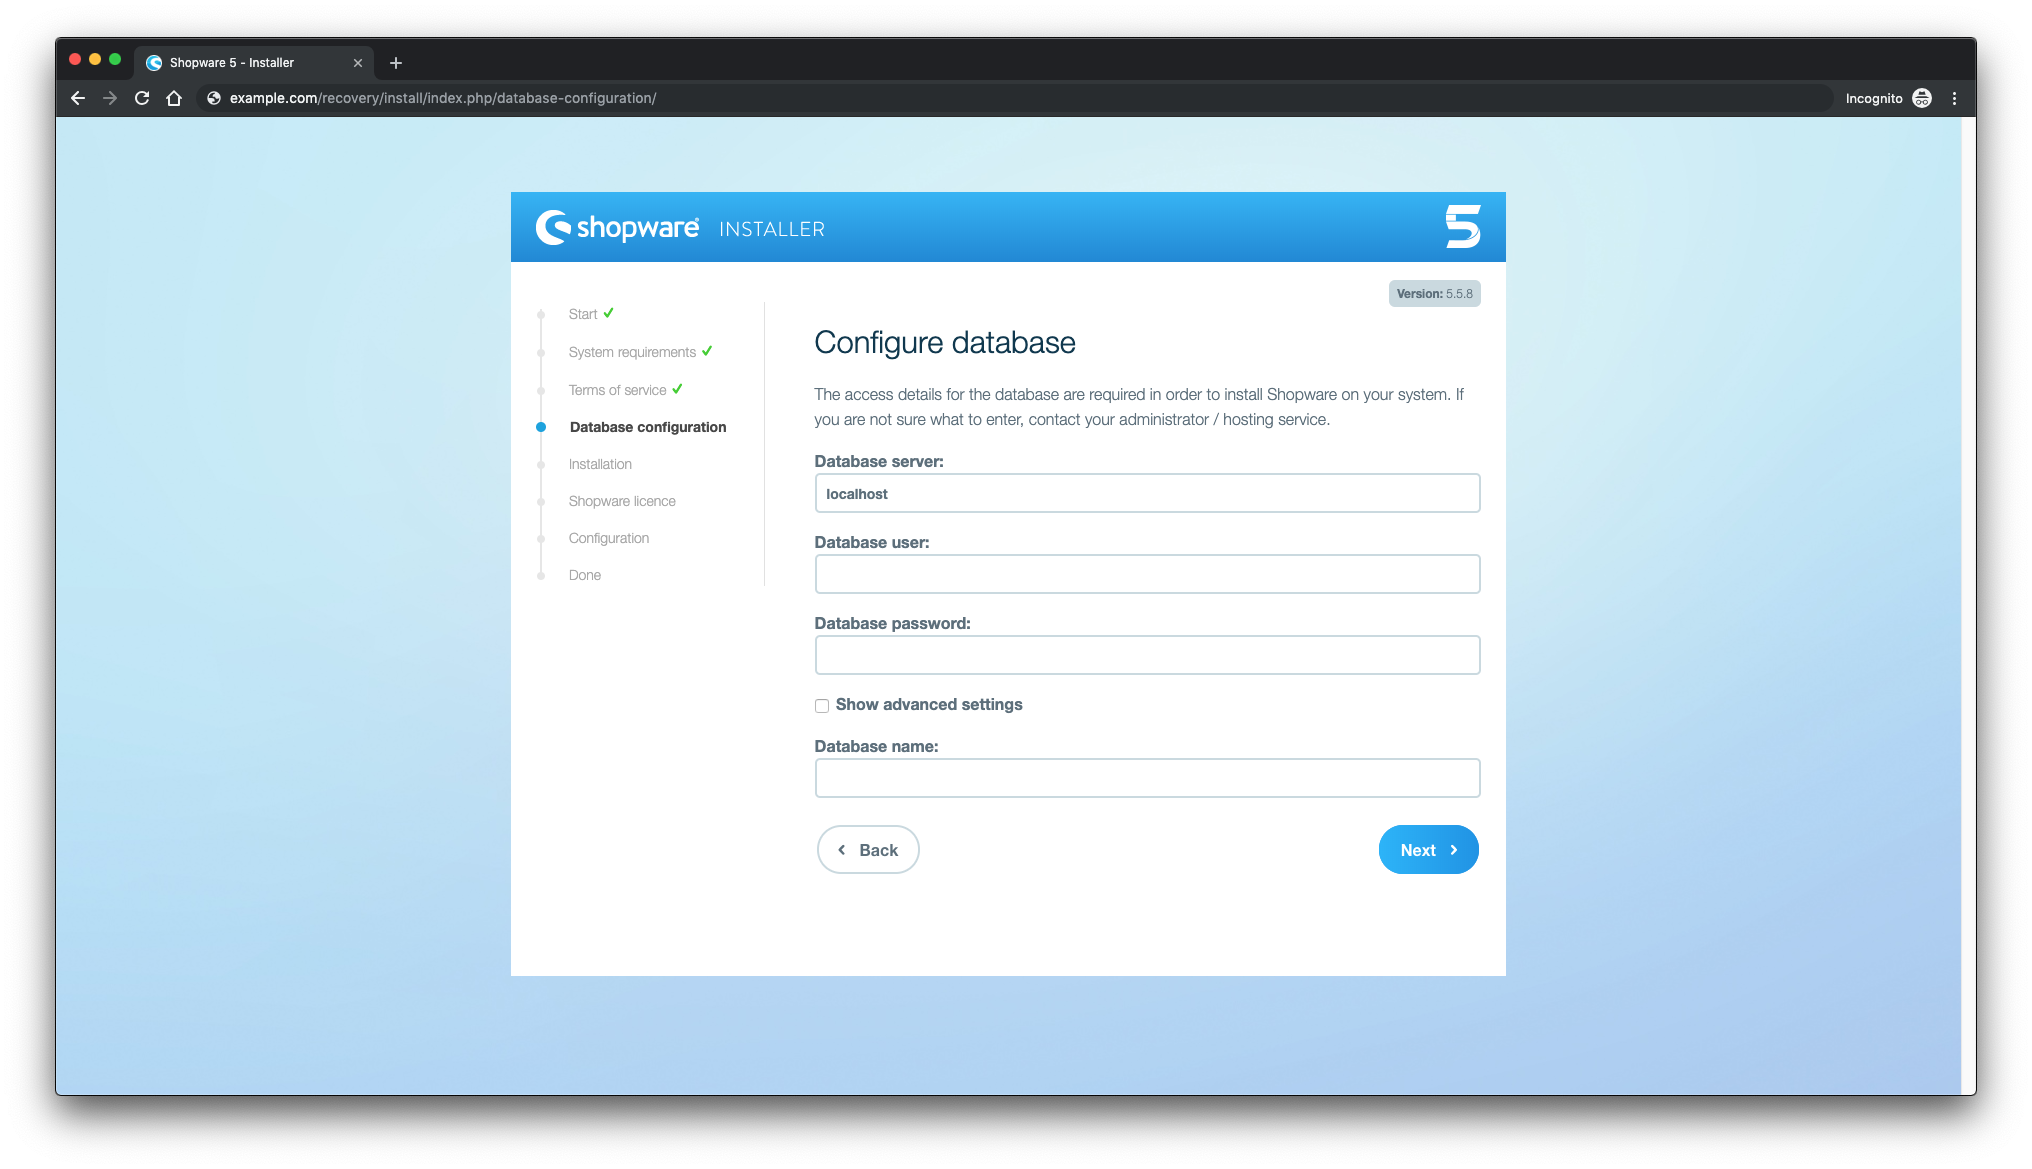
Database Selection: select  the option MySQL and in the Install Type, mark the Create a new database for OTRS option and click on the next button:

Select database type mysql

Configure MySQL: fill the fields User, Password and Host (remember the data of the MariaDB configuration that we made) and press check database settings:

Insert database login details

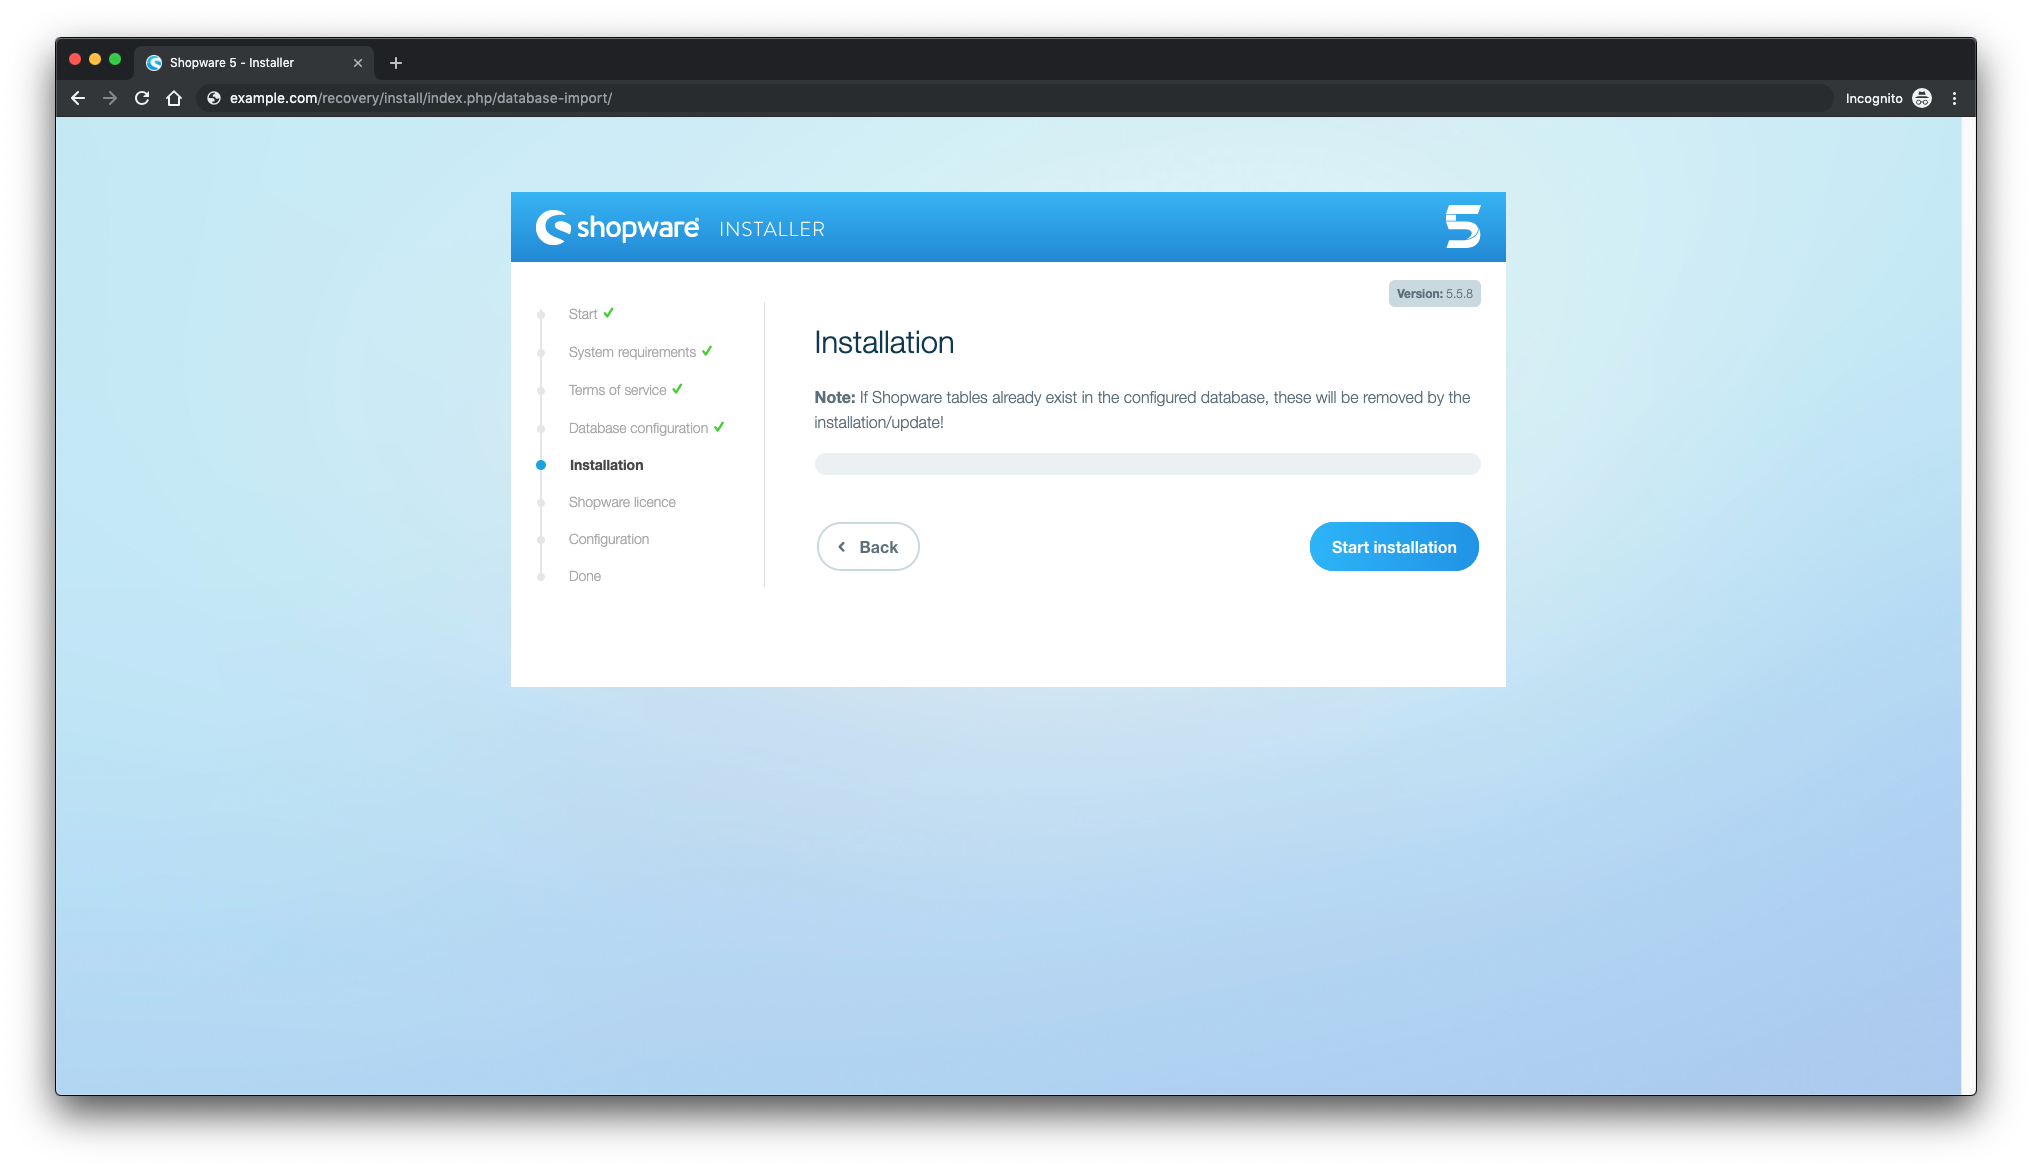
The OTRS installer will create the database in MariaDB, press next button:

Create OTRS database

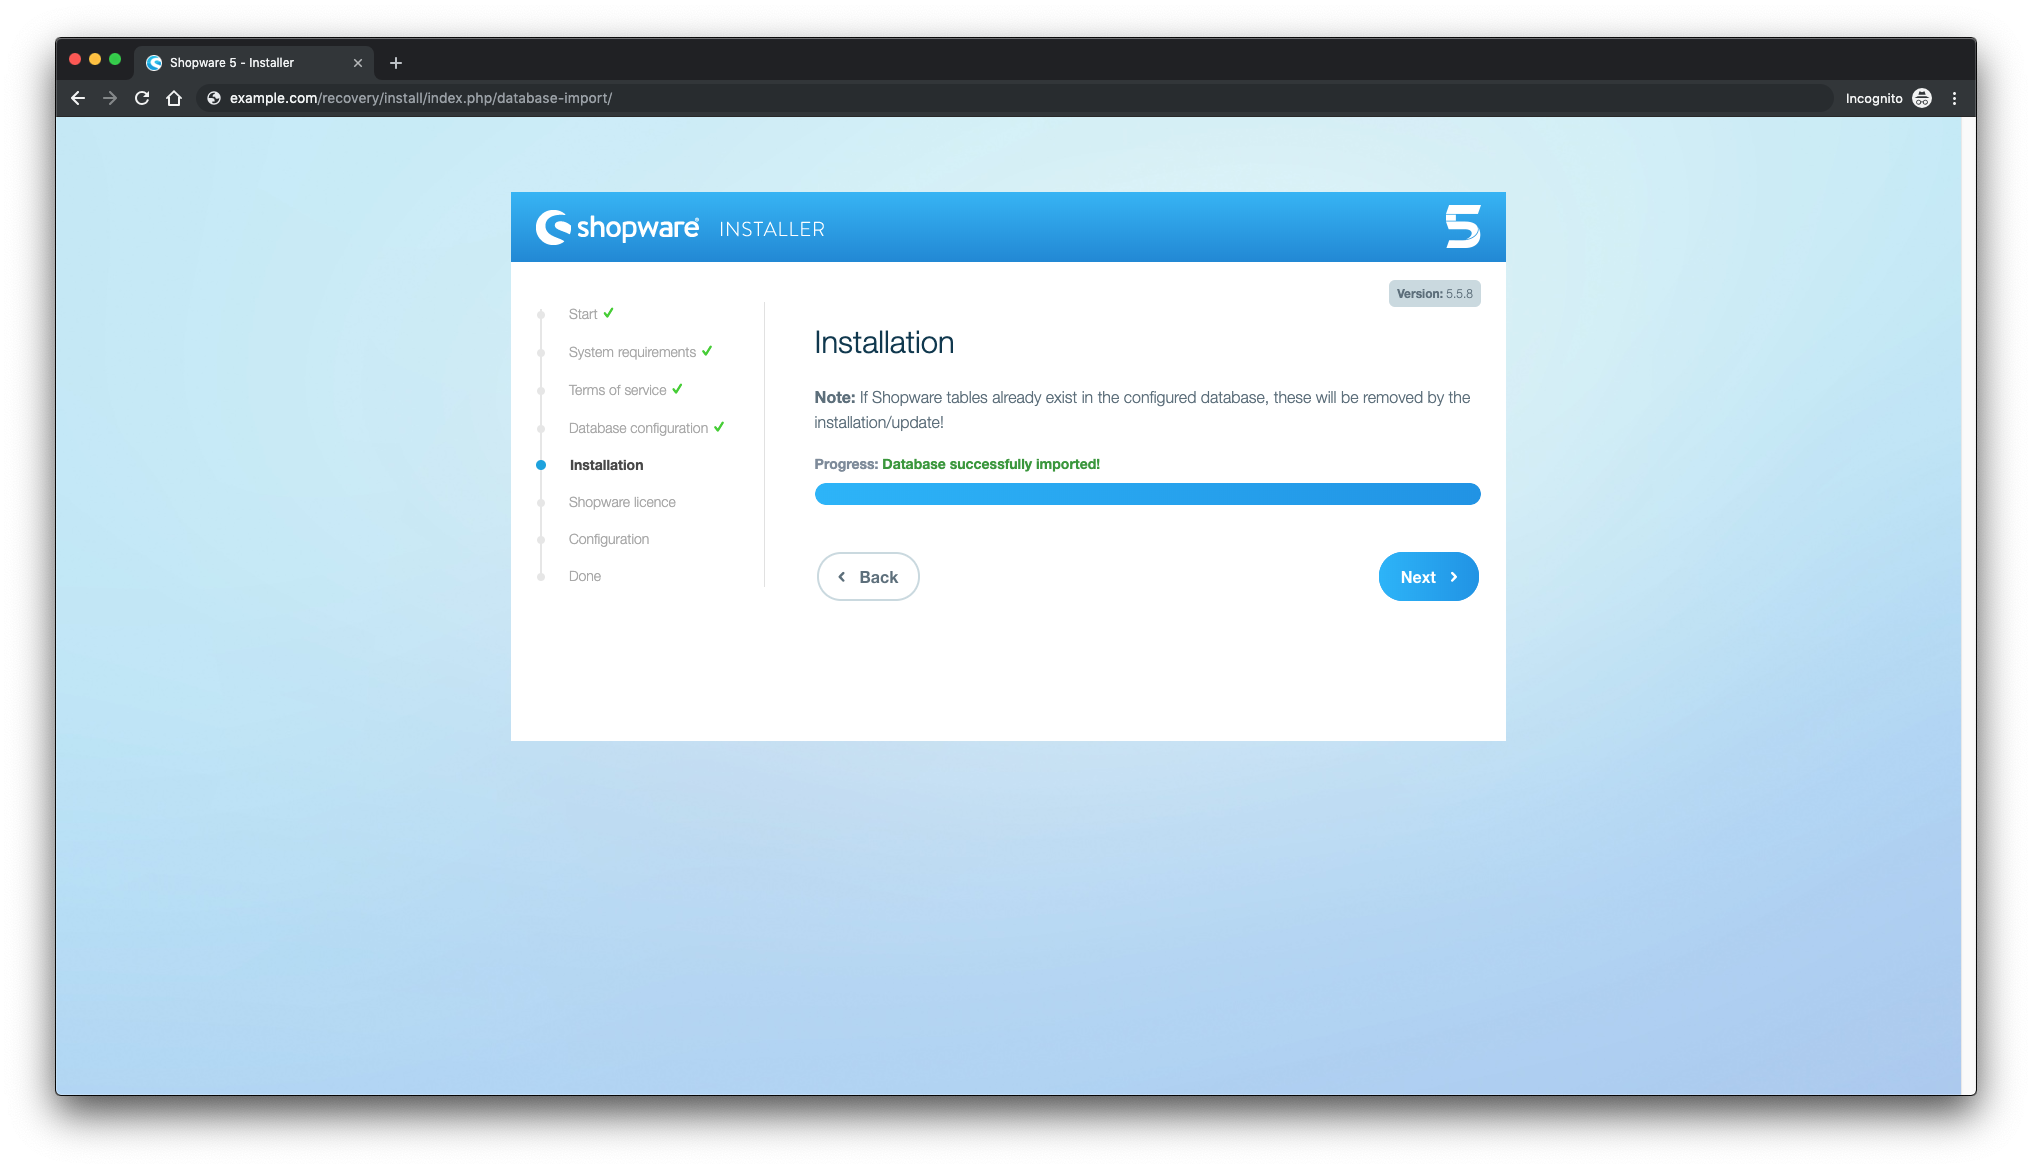
OTRS database created successfully:

OTRS Database created

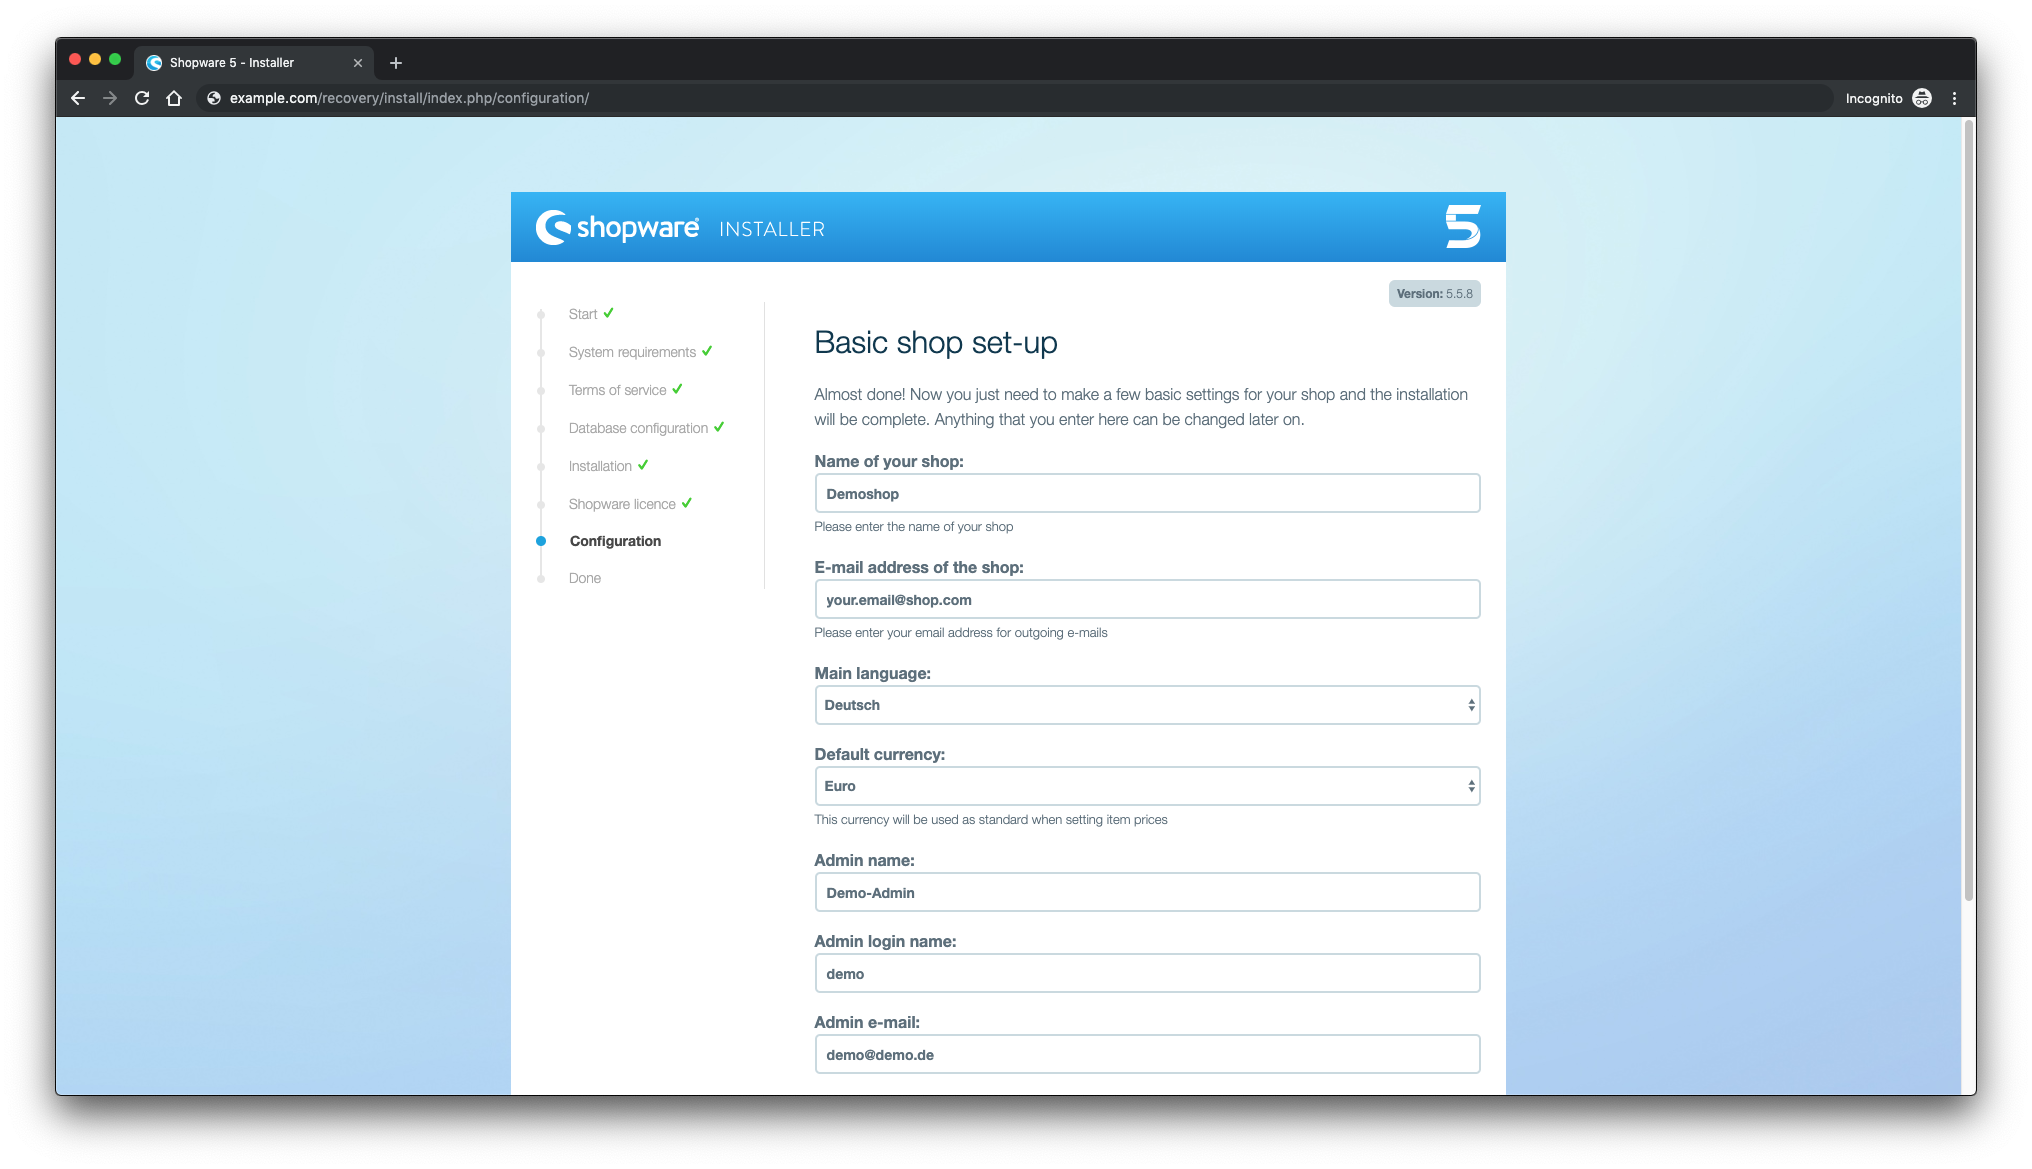
Config system settings: fill the fields with your own information and press next:

Set the personal config details

OTRS E-mail configuration: fill in the fields acording your e-mail server. In my setup, for outbound email I use SMPTTLS and port 587, for inbound email, I use pop3, you will need an e-mail account. Check mail configuration or skip this step:

Email setup in OTRS

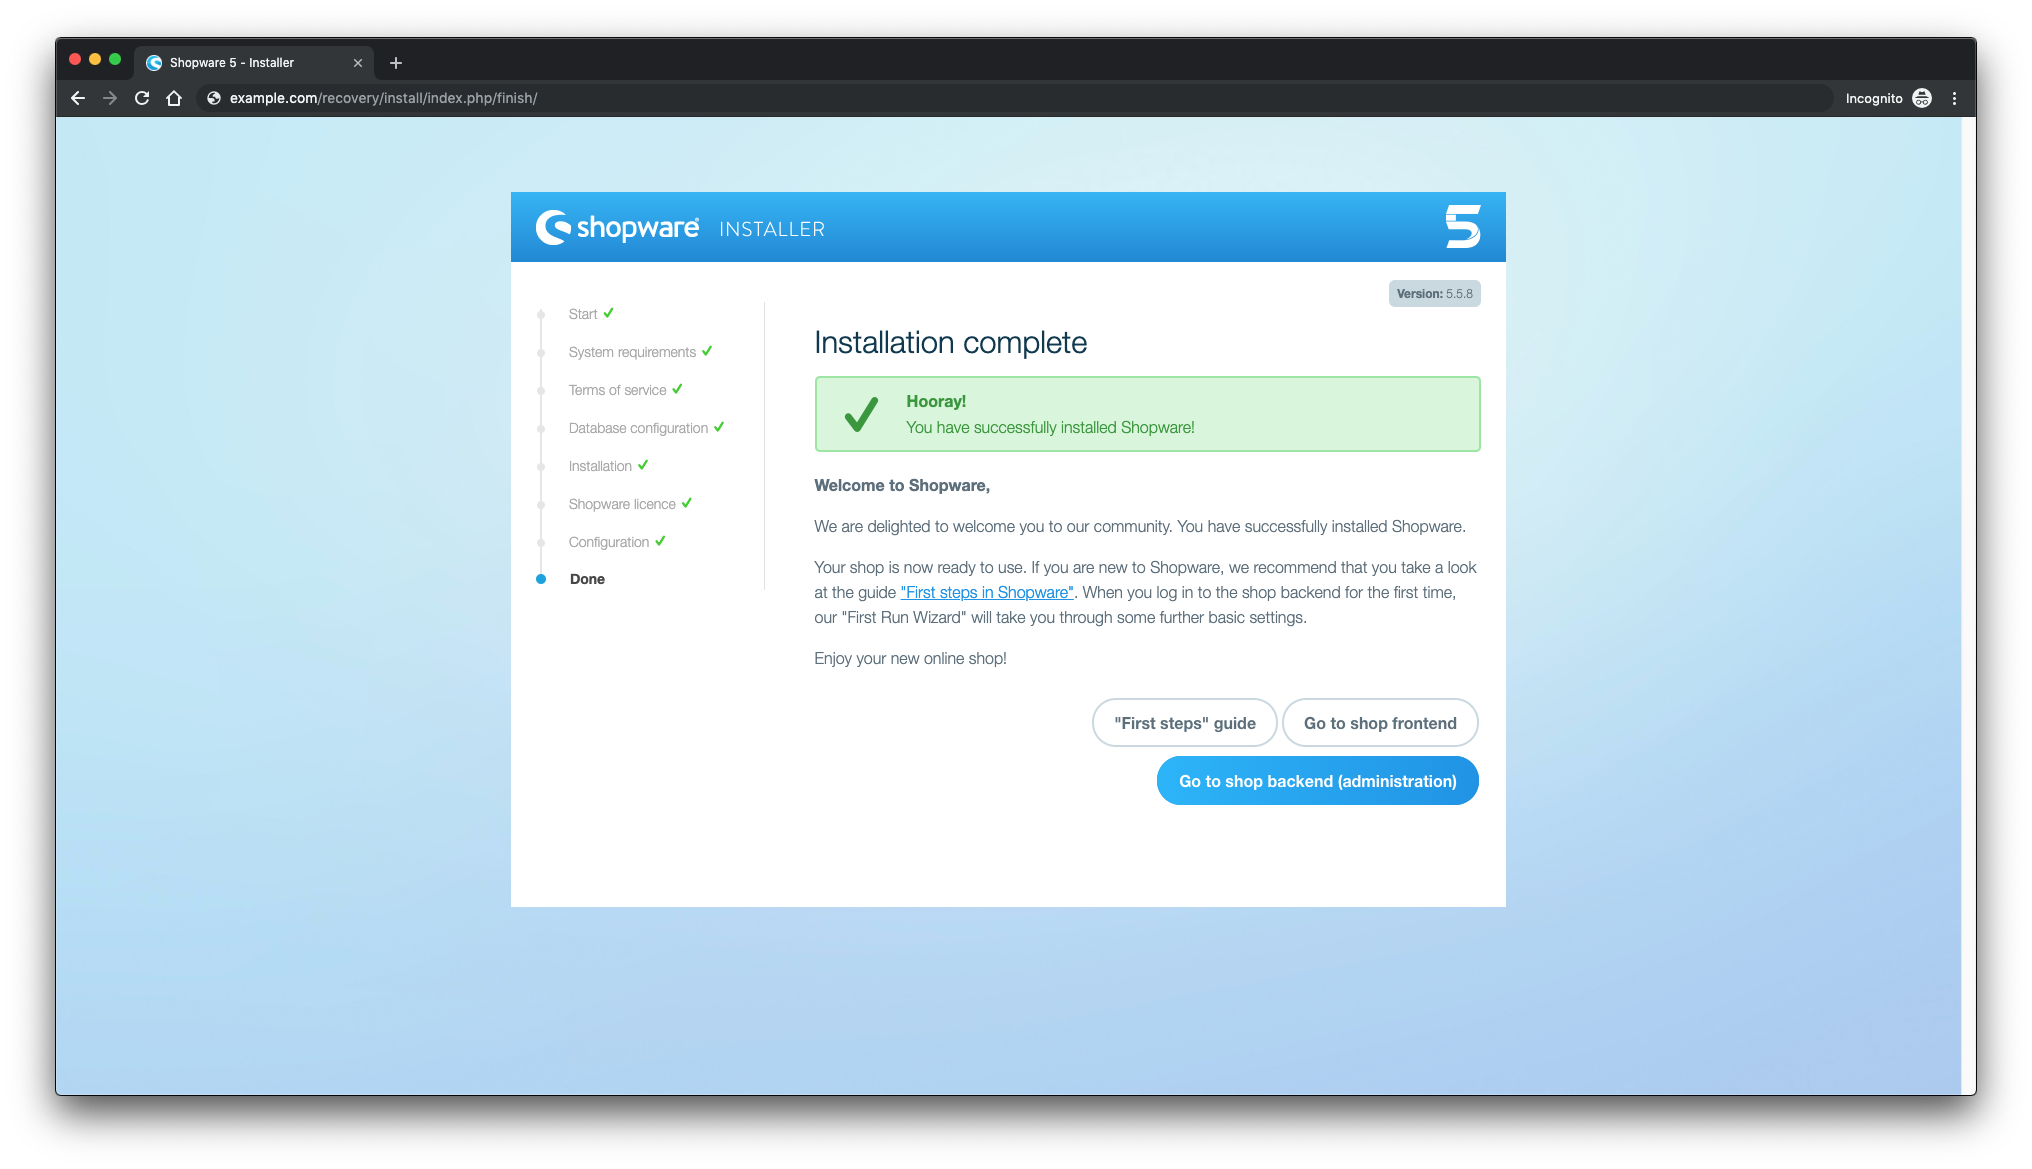
To finish, take a note about the user and password to access the OTRS, after login you can change the password:

OTRS Username and password

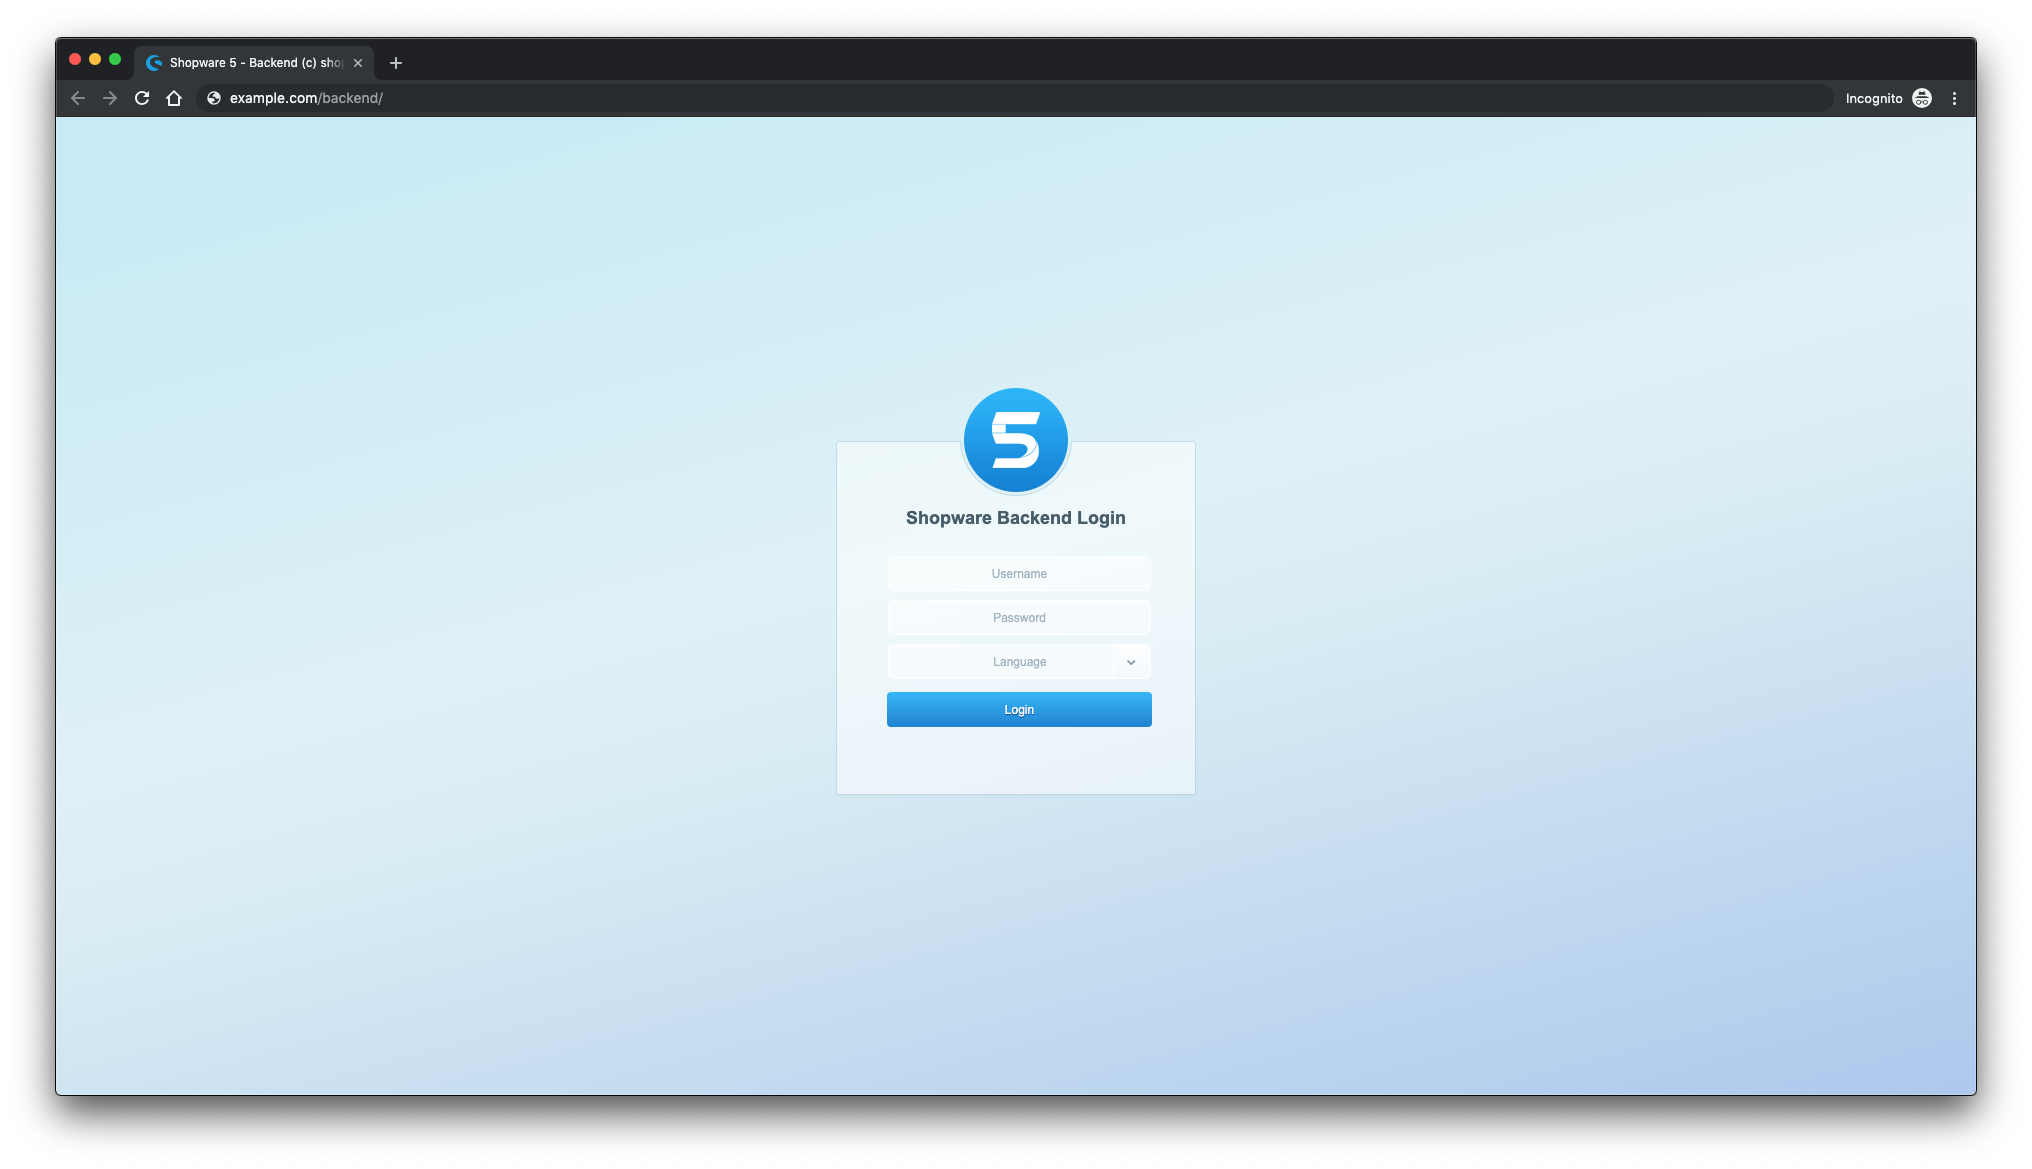
The OTRS url login is https://centos7.local/otrs/index.pl?. Remember, centos7.local is the name of my server, insert your hostnamen or IP address.:

Login to OTRS

Login at the OTRS:

OTRS Admin Login

OTRS is installed and ready to be configured with your support rules or business model.